Mixed-media paper crafter; stamper, freelance craft tutor, designer of PaperArtsy JOFY stamps

26 January 2017

#365Challenge.... January: Part 2

It feels like I'm still playing catch-up after my computer crash late last year which meant that I wasn't able to blog as often/easily as normal.  Each year I change the header on my blog and I wasn't able to do that but hopefully I'll rectify that soon... and post the 'backlog' of 'things'...  aaaw rats! one of my New Years resolutions is to use the words 'stuff' and 'things' less...  oops..  Did you make any resolutions for 2017?  Any fun ones?  I think a checklist of 'things to do in 2017' would be a fun list to draw up - it'd give the year focus wouldn't it? It wouldn't have to be huge monumental events or goals, maybe just quirky little things - trips, or lessons/courses....  I'll leave that with you to ponder..

In the meantime here are more pages/cards from my #365Challenge.... 


I must admit I'm not making much impact on the stash but I am having fun and its great to use my new JOFY stamps and stencils on journaling cards...


Just to remind you my self imposed 'rules' for the 365Challenge are:
1. Answer the questions
2. Use only supplies I have in my possession... attacking the stash as ever!
3. Make a card each day
4. HAVE FUN!!


x
Share:

25 January 2017

#365Challenge.... January: Part 1

Since the start of the year I've been creating postcard size (6x4in) mixed media journaling cards. Each one is prompted by the questions asked each day on the Flow Magazine Calendar.

I really like the idea of this - answer a question a day, make a card in the process... how hard could it be?! Well it turns out sometimes the questions are quite tricky to answer and make you think.. and sometimes if the questions are too tricky I just make a pretty card instead! lol
Its my plan and I'll bend the rules if I want to!

My self imposed 'rules' are brief:
1. Answer the questions
2. Use only supplies I have in my possession... attacking the stash as ever!
3. Make a card each day
4. HAVE FUN!!

I post the cards on Instagram (you can follow me on Instagram @jofyjo ) but I plan to upload them on here in batches - probably in groups of 10-15... here's the first group  (if you have any questions about the supplies used (want to know what the question was for a particular day) you can check my Instagram feed or leave me a message in the comments.)


There are all sorts of 365 challenges going on via blogs, twitter and Instagram so why not find one that suits you and give it a go...

Thanks for stopping by
x
Share:

23 January 2017

Facebook Live and Periscope!

I went on Facebook Live and Periscope on Saturday evening shortly before the release of the latest JOFY products and demo'd a couple of new products with quick projects - I thought I'd give you some details of what I created and answer some of the questions that popped up on Periscope... and show you the finished projects..

For both projects I kept to the same colour scheme which is shown below - lush colours!

I 'broadcasted/streamed' (?!) on Facebook first, where I created this white flower on a kraft background - the stamp is JOFY51 and stencil PS037.
I was asked in the comments on the PaperArtsy blog do I go over the stamped lines with a black pen.... the answer is yes, sometimes I do - if the print hasn't come out perfectly (much more to do with my inking of the stamp than the quality of the stamps - PaperArtsy stamps are some of the best around (if not the best around!)).  The pen I use is an Artline pigment ink pen.

I added detail to the flower panel by adding faux stitching around the edge, gems and Stickles on the flower centre and I stamped 'happiness' in the bottom left corner. 


 I mounted the panel onto a white cardblank and stamped 'blooms from within' inside.

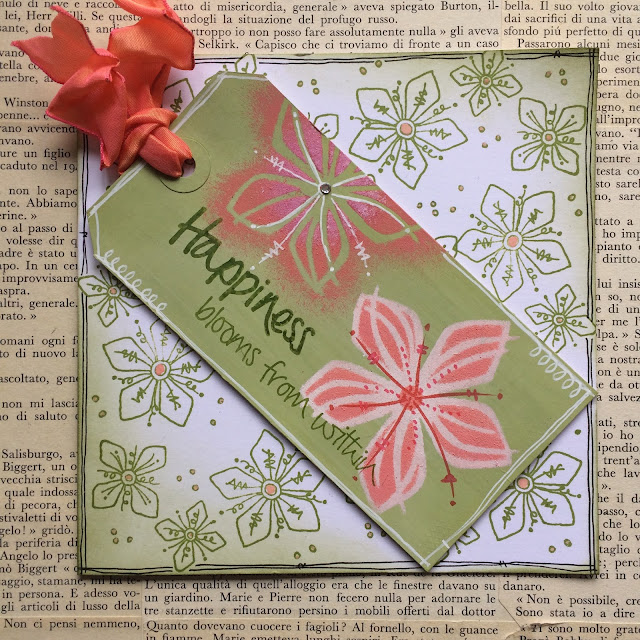
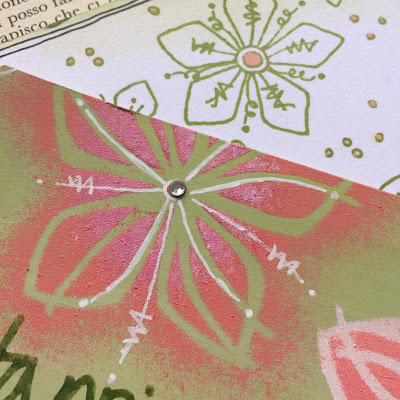
On Periscope I worked with the stencil/mask combination PS057, creating a tag using the positive and negative elements on this stencil.  I added white and red doodling and mounted the tag onto a white card that has been stamped with on of my mini JOFY stamps - JM49 - this is a great little stamp to use with this stencil and with JOFY50.  I was asked what white pen would I recommend - my white pen of choice is a 0.7 white Posca Pen. (The green 'clouding' around the edge is Peeled Paint distress ink, and 'Happiness blooms from within' is stamped in Leaf Green Archival ink)


Thanks to everyone who tuned in... was a lot of fun to do these mini 'broadcasts'.

x
Share:

21 January 2017

Did someone mention a new JOFY release?!?!

..... and breeeeeaathe!... I don't have to keep it 'secret' anymore - I can talk about the new JOFY stamps, stencils and masks officially released today!  This release takes the JOFY range over the '50' mark - FIFTY TWO stamps sets!!! I can't quite believe that over the last 6 years I've designed that many - and thats not even counting the minis! phew!
I'd like to say a big THANK YOU to all you lovely peeps who have bought JOFY stamps and of course big thanks also go to the lovely uber talented team at PaperArtsy for making the stamps!...   thank you for spending your hard earned pennies on (and creating with) the JOFY range - those designs/ideas that come out of my head:
... that I draw onto paper
... that PaperArtsy turn into rubber
... that you print/stamp back onto paper .....................that's a lovely creative circle isn't it?!

This release has four new stamp sets and 4 new stencils/masks that Leandra will show you in this video..


Here are the four stamp sets:


Stamp and coordinating stencil

...and the other stencils...


PS057 (above) is a little different in that the flowers snip out and are masks (squeek) creating a stamp and stencil combination!!! (loving that just a little bit MUCH! lol)

Over on the PaperArtsy blog tonight there are lots of lovely samples using the new stamps, and here are a few more for you featuring the stencils...


These samples using the new stencil PS056 & 57 have all been made using the fabulous Fresco Finish paints and Archival black ink.


I also decorated this dinky little shadow box (6.5x4.5in)- it gives great dimension as there are 2 glass panels in the centre - lots of fun to work with.. I wanted to show you that the big image on JOFY51 can be used as a flower or as a sun..


To help with samples for this release I had two fantastic wingmen, big thanks go out to them both - Sarah Anderson - her blog is HERE - and Keren Baker - you can find her blog HERE - please go take a look at their blogs where you'll find more info on the projects they created.

Apart from here on my blog you can also find me on Twitter and Instagram @jofyjo and on Facebook www.facebook.com/JoFY.JoFirthYoung
I'm also thrilled to be a teacher on this year's Wanderlust - for details and sign up click on the Wanderlust graphic in the top right hand corner of the blog.

I hope you enjoy this new release & look forward to seeing what you create with them!

x
Share:

19 January 2017

Paints, stencils and gelli prints... Oh my!

So I've been a bad/abset blogger for a few weeks... the reason for this is my PC became a victim of the curse of 2016 and we had to add it to the list of 2016's fatalities - it died the week before christmas! This was a drama for me because
a) I use it A LOT!!
b) EVERYTHING is stored on it - you know things like holiday photos, work bits and pieces, existing designs, working designs....
c)  I HADN'T BACKED IT UP!!!!!!!!!!!!!!!

My friend was brilliant & took the pc apart and retrieved the hard drive and all the information (he is now my tech'geek hero!) ... YAY! WOO HOOOOOO!! (a massive thank you to him!)
aaaand breeeeaaathe!

I can now see all my information and use it but I'm working on hubby's laptop which is good but its not like using my pc - I feel like I'm working with one hand tied behind my back!  sigh  but, I appreciate it could be worse & I could have no pc at all.... so I am grateful (very grateful!) for what I have.

aaaanyhooo enough about my PC/technical woes an on to prettier paintier things...


I made this box canvas late last summer (inspired by the gelli print play day I had with friends) and forgot to share it with you (like I said at the start  - bad blogger, bad blogger).. its a gelli plate printed box canvas, painted with Fresco Finish paints in various shades of green and blue and stencilled using Stencil Girl, Artemio & Donna Downey stencils.
I really like how it turned out - so much so its actually on the wall in the lounge! I know! Shocker!! My own work on the wall in my own home! Whatever next!

x

Share:

6 January 2017

Coming soon....

.... new JOFY bits n pieces.... head on over to the PaperArtsy blog for some cheeky sneek peaks...


Share:

1 January 2017

Cass Art #BeInspired challenge...

... A new year brings new challenges and projects. I was recently approached by CassArts (fabulous art shops countrywide - you can find them online HERE) and invited to be part of their #BeInspired challenge for 2017.... and I've happily taken up the invitation... all very exciting!

The first challenge went live today.  I was sent a 'mystery' package (who doesn't love a mystery package!) and inside was this great product selection..


This was going to be fun!  Air dry clay has been in the back of my mind for some time as a product to experiment with and use in different ways... so this pack got me thinking....  The pack contained Das products - a slab of plain clay, a rolling pin, 2 packs of coloured/marbling clay and a bottle of varnish...  all a little out of my comfort zone of paper, paint, and stamps... but this is good!

I really like the simplicity of the rolling pin - and the removable rubber rings  - 2 of each size (one for each end) to ensure even depth when rolling out the clay - simple but effective!

I combined the plain clay with one of the colours - 'Sodalite Blue' - I just squished (I don't have a technical term for that process lol) them together and then rolled them out - I really like the unpredictability of this - no two pieces are going to be the same & I like how one side of the rolled out sheet is completely different to the other.


Once the clay had been rolled out I used a star shaped pastry cutter to cut several stars from the most interesting patterned areas of the clay, when they were dry I gently sanded the edges & painted several of them with the varnish - in the photo below the right hand star has been varnished giving it a lovely gloss finish.


I rolled the excess back into a ball, then rolled it out flat again and after pressing some rubber stamps into the surface to create an impression I cookie cuttered out some more shapes.  I pierced holes in all the shapes, and laid them on the radiators to dry, turning and flattening them occasionally.


I planned to use these pieces as embellishments for presents - they can be used all year and can be personalised, and because the clay is really lightweight it doesn't add weight to the gift wrap.


The photo below shows how I've used them on a wrapped bottle - all the stars have different effects: Top star has a pattern pressed in to the surface using a rubber stamp into the surface (red/grey rubber stamps are better for this than clear stamps as they are firmer); middle star has been varnished and a monogram stamped onto the surface; the bottom large star has been left plain.


Here's the small present nestled into the christmas tree - cute!

I created some pieces with the plain clay too - there's a blog post featuring those coming in the next week.

x


Share:
Blogger Template Created by pipdig