Mixed-media paper crafter; stamper, freelance craft tutor, designer of PaperArtsy JOFY stamps

9 August 2018

Size doesn't matter...

... when it comes to art journals... this one is at the smaller end of the scale....

This is my mini midori style journal, made with off-cuts left over from when I created a batch of leather bound journals for christmas 2017.

I've added a pencil to show the size of the journal - pages are approximately 5x5cm - not as mini as some journals out there but mini enough for me! lol

Its really a tiny junk journal created with 'HappyScraps' - those discarded pieces that are too nice to throw away...


(this is a flower from JOFY61, and I've doodled around the edges to make it larger.... nice!)

 ooooh doodling in white rather than black


Still enjoying working with watercolour paint - and I really like how different they look on different surfaces  - above is on canvas and below is on Smoothy card...


I coloured this page with Tombow brush pens (I like those A LOT) and then added some neon gel pen marks - it all looks quite subtle and 'normal' until its placed under a UV lamp!!!!

Here is the same page - left is daylight, right is UV light - crazy!!  Love it!
(could easily write secret messages only seen under UV light....... lol)


Working in this book was a lot of fun - no pressure - the pages are a bit 'goldilocks' - not too big, not too small - they were just right!

Have a go at working small - its fun - trust me! 

Thanks for popping by!


Share:

18 July 2018

Watercolour paints.... (part 2)

When I'd finished painting flowers for the card I showed you in an earlier post (you can see it HERE) I had some pieces left over and wanted to make something....

... so I made this...

Its a spread in my small Dylusions journal using the leftover flowers and leaves.  The phrase is my saying for this year - LESS IS MORE - less clutter, less 'stuff' around us - do we really need half of what we have? Its something I'm trying hard to be more mindful of...
(though I more not sure this phrase applies to time... we could all do with a bit more time couldn't we! lol)

The page is a interpretation of the phrase - lots of open space and very little clutter of embellishments or colour... and the word 'LESS' is intentionally bigger so its the one that draws the eye.


Do you have phrases/mantras for the year? or maybe just a word?  (by the way my word is 'focus')  I'd love to hear what yours are and why? (if thats not too nosy of me! lol)


Thanks for stopping by

Share:

Watercolour paints.... (part 1)

... aren't something I use very often...

 ... and when I say watercolour paints I mean palettes of traditional watercolours... but I 'recently' bought a set of Prima watercolour paints to use with my flower stamps and am loving how this simple mini stamp (JM59) looks when painted with these fabulous colours!

I really enjoyed painted in watercolour - I really like how the paint can be moved about, diluted and layered up... you have to be quite gentle with it though! lol

 I assembled all the flowers and leaves I painted onto a card:

The leaves are from JOFY61 and seem to be my 'go to' foliage at the moment - they seem to go with everything!.

I'm looking forward to working with these paints more in the future....


Share:

11 March 2016

The first of many...

... cards that are required in March (wedding anniversaries x2, mother's day x2, birthdays x 4 (at least! lol))..

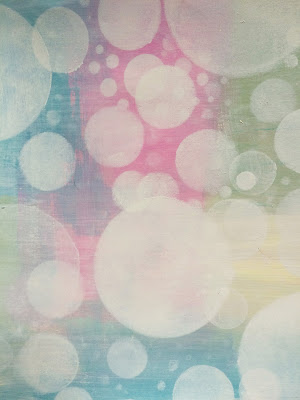
I taught a workshop at That's Crafty this past weekend where we created a canvas with a Bokeh inspired background... I was 'in the zone' so used the same technique to create a masterboard/background for several cards.. (created with Fresco Finish paints)

Here's part of the masterboard background...

I made 4 cards using this background including these two cards for my Mum and Mother-in-Law - love the flowers on these (from the stash - I think they are Prima).. great to have all the colours on the background to choose matching embellishments for.. (cards measure 12.5x12.5cm - this is a favourite card size for me - not too big, not too small)


Thanks for popping by

x
Share:

19 April 2015

Inky painty indeed!

A day spent at That's Crafty, running my first workshop at this great craft shop (where they have probably the biggest range of stencils I have ever seen in one place! and lots of paints, inks, and other 'stuff' to work with them!) :o)


We created this cute canvas combining JOFY stamps with a Prima Julie Nutting girl stamp - I have a couple of these and they're adorable and, I think, work really nicely with the JOFY stamps.


Everyone in the class created lovely (and finished) canvasses - and had free range to choose outfits for their 'girls' from a pad of My Minds Eye papers - nice small designs which were perfect for dress fabric.

Here are a couple of boards:

I really liked the bold geometric of this dress (on Linda Carpenter's canvas) (I would wear that dress, if I was younger!), and the blue bee-hive.

This girl (Janette Smith's) also wore a largish print, this time with co-ordinating flowers - really fresh and summery.

People were sometimes undecided on how to layer up the dresses - with contrast pockets or without, with or without contrast sleeves so I suggested (because lets face it nowadays most people have a camera phone with them and its a useful tool) they photograph the dress with the options and then look at the photos - which is what we did with the cute blue yellow dress (on Liz Riding's canvas) shown below - love this option... (by the way: the contrast pocket option was chosen)
This was a fun class - & its always interesting at the end of a class to see how the canvasses are all so similar but all different at the same time.

x

Share:

10 January 2015

Some dies are like puppies - they are not just for christmas!

I love a bit of die cutting!!  and recently the lovely Paula Pascual gave me several of the die sets she designed for Sizzix - such a clever chickie!!

I've been using this one- its a christmas set - but I seriously think its too good to use only at christmas! (called 'Christmas Phrase Cards' ref 659973)
 
The 9 dies cut pocket-scrapbooking sized cards and co-ordinating elements - words, a word block.  and a really useful circle.

I have used it for festive projects, obviously - as part of my 'christmas book' (more about that tomorrow)...
On this page I cut a white panel, a kraft word block and a blue spotted word - love how all the elements layer up - and looks great laid over my snowflakes stamps.

On this page I just used a single word... (I'm definitely a 'less is more' type of person)

I started playing around with non-festive ways to use the dies and elements, using the Prima Epiphany 6x6 paper pad for these projects - great pad - lots of each design, double sided & a little bit distressed... but not grungy - nice.

What I like about the dies is that they can be positioned in just the right place over patterned papers to create perfect little scrapbooking cards, or panels for cards - so it you want to cut at an angle right in the middle of the page you can!... It so much quicker and accurate to die cut than to sit and measure the space - not lazy just time efficient!
I use the magnetic platform with my BigShot to hold thin dies in place - genius piece of kit for the BigShot - you NEED one of these is you use thin dies! I bought mine from the The Stamp Attic

I got busy cutting bits and pieces: several panels using the different sizes of journal cards (creating perfect mat'n'layers (bottom left in picture), and circles as motifs.. the rectangular cards are ready for journaling or large words of photos...

On this card I mat'n'layered two panels, tearing off the bottom of the smaller panel.  I chose this circle motif because of the hanging thread of the cages...

I marked the position of the hanging cord, so I could remove the circle and sew the line on my sewing machine

Here is the finished card - the circle a has been 3d mounted...  Note about the sewing: my sewing machine was having a funny five minutes and the tension wasn't quite right which caused the odd stitching (in cream) down either side of the card...
I could've unpicked it and restitched but one of my new year resolutions is to 'embrace the imperfections' and so I left it as it was... the stitching isn't horrible, its just not what I planned ... so it'll stay

This card is created with the scrap panel remaining when the circle was punched out..(too interesting to waste!)..  I rounded off the corners (with the We R Memory Keepers Crop-a-dile Corner Chomper - another go-to tool)

The circle becomes an aperture to mount flowers, embellishments onto, and one of the words from the die set - nice for a birthday card (or if used with the right colours, papers and embellishments- a baby card)

I liked how this card looked (I'd added lines of stitching...) so I mounted it onto a 12.x12.5cm greeting card:

I sewed the die cut circle onto a card to create a simple panel:

I stitched onto all of the cards to add texture/interest, but the stictching can be seen on the other side of the card so I covered the stitching with washi tape (LOVE!)

I had fun playing with this set of dies - I like them very much - going to be using them A LOT - and are definitely not just for christmas.

I created the pieces above but then discovered lots of little bits & pieces of the paper that were too nice to throw away, so I chose some scrapbooking cards and altered them... (cards that I wouldn't use in their current format).. I think covering the words also makes them more versatile...

Here are the cards - I also added some stitching - all these little additions and alterations makes them more personal, individual and less generic...


and created a whole batch of co-ordinating cards.... ready for journaling, scrapbooking & cardmaking - even a quick thankyou note or gift card...

And now I am definitely finished- no more scraps to use!

xx
Share:
Blogger Template Created by pipdig