Mixed-media paper crafter; stamper, freelance craft tutor, designer of PaperArtsy JOFY stamps

21 December 2011

WOYWW...

... not much has changed since last week! So this is my messy painty desk - the one I usually post photos of:
Sketchbook on my still-very-clean craft sheet, ink pads, the glass balls on the right of the photo are a lamp I've brought in from the lounge to use with a daylight bulb (the light in my workroom is an old round(!!) flourescent) but this week no Lola on the desk...
and thats because she's here at the other desk! lol
This desk faces the other one (I stand/sit inbetween), and its quite tidy!

Festive accident update - the eye is not 95% back to normal, cheekbone swelling gone done but still painful and bruise on leg still going through some interesting colour changes... so its all good! lol   Not to be repeated I can assure you - I've had my share of accidents and incidents this year! Here's to an uneventful 2012! lol

Thats all folks - go and snoop elsewhere - :o)  go to Julia's (queen of WOYWW) blog to see what this is all about.

Just in case I don't see you again before 2012: thanks for stopping by in 2011 - it wouldn't be the same without you and I wish you all a
MERRY CHRISTMAS &
A HAPPY HEALTHY CRAFTY
NEW YEAR!!
Share:

16 December 2011

Things are changing over on the lilypad...

... because Banana Frog will be closing the doors to the lilypad at the end of January.
I have really enjoyed my 3 years on the Design Team - 3 years!! Time really does fly when you're having fun!
I'd like to thank Bev (Leader of the Lilypad!)(Top Froglette) for inviting me onto the DT, for being a great designer of stamps, and for generally being a bit of a superstar! lol
And thanks to all the Frog-Followers for stopping by the Banana Frog blog and looking at all the DT's projects, I hope you've been inspired to go and stamp on anything and everything :o)

I've been taking a look at the projects I've made over the last 3 years for Projects of the Days, Blog Hops and for Bev's tv appearances and I thought I'd show you some of my favourites.
 
One of my favourite stamps sets is 'Scribble Flowers' - *love* this set!
Looking back I've made lots of cards with the stamps sets, and also a couple of lengths of bunting - and I think that I've mentioned how much I like bunting - it makes me happy!
The bunting banner above was created for a Project of the Day, and the one below was made for Bev to take to a Create & Craft filming as a sample... so pretty it makes me smile and feel all christmassy! lol
Its really hard to choose favourite projects, or favourite stamps sets - I like each one for different reasons - here's 'Retro Space' (a really fun set) - I think this card is one of my most favourite that I've created - its soo retro! (and you can't tell from the photo but its dimensional. love!)
And last but not least - CUPCAKES!! These cards are too pretty by far - can't beat pink, sparkles and cupcakes.
I hope you've enjoyed my little look back at projects, if you hop on over to the Banana Frog site there are lots of bargains to be had... though things are going fast so I'd be quick if I were you!
Take care

Jo
Share:

14 December 2011

WOYWW

I wasn't going to WOYWW this week until this photo opportunity came along:
This is Little Miss Lola, she's sitting on the only clear part of the desk (I've been busy creating so its a 'little' messy).  She sits there because she can't get any further - no clear space.. and she's not as agile as many other cats due to a tricky knee and a certain amount of chubbiness! lol but she's adorable so I thought I'd make her the 'star' of my desk this week.

Speaking of agility or lack of..
Oh yes, that shiner is my right eye! Sustained while decorating the christmas tree on Sunday.
Do I get the prize for 1st festive related injury?
So here is the festive crime scene, and no, don't adjust your monitor- the tree is supposed to be upside down!
So the lesson I learned (the hard way) from this is that you should not step down from the arm of the sofa (should I even have been standing on the arm of the sofa?) onto a cowhide covered (solid) pouf in loose fitting wool socks!
The combination of all those things is that I slipped on the pile of the fur, the pouf went one way, I went the other - straight onto the edge of the metal boxes next to the tree, resulting in a blackened eye, a very sore cheek bone and a bruised leg.  Merry bloomin christmas!
I am finding this quite funny because:
1.  I never normally do things like this (its been 37 years apparently (according to my parents) since I last blacked my eyes - the last time being 2 days before the photographers yearly visit! Its all in the timing! lol) 
2.  I could have knocked my teeth out - makes me feel quite sick even thinking about that!
3.  I'm quite enjoying watching it change colour - every morning its been a different colour and the swelling has moved...

So, please be careful while decorating your tree - let my black eye etc be a lesson for all of you!  :o)
There ends todays health & safety informtion post.

And to learn more about WOYWW go here

and after a post like this how could you not want to follow this blog?! lol   It has everything - public information, cute picture of a cat, crafting - oh well, no crafting today but there is normally!  So please follow because:
" - I'll be a happy little blogger if I can get up to (or over!) 100 followers by 2012... in fact I'll be so happy I'll have a little blog-give-away in celebration!"
Share:

8 December 2011

Christmas... part 4...

The temperature is definitely dropping, and all the leaves are falling off the trees (which is keeping Mr JoFY and his newly acquired leaf blower busy)(can't get my head round that - he's basically hoovering the garden isn't he! lol) so Christmas is on its way - confirmed by hearing 'last christmas' by Wham! played in a shop - that's how I know its christmas!

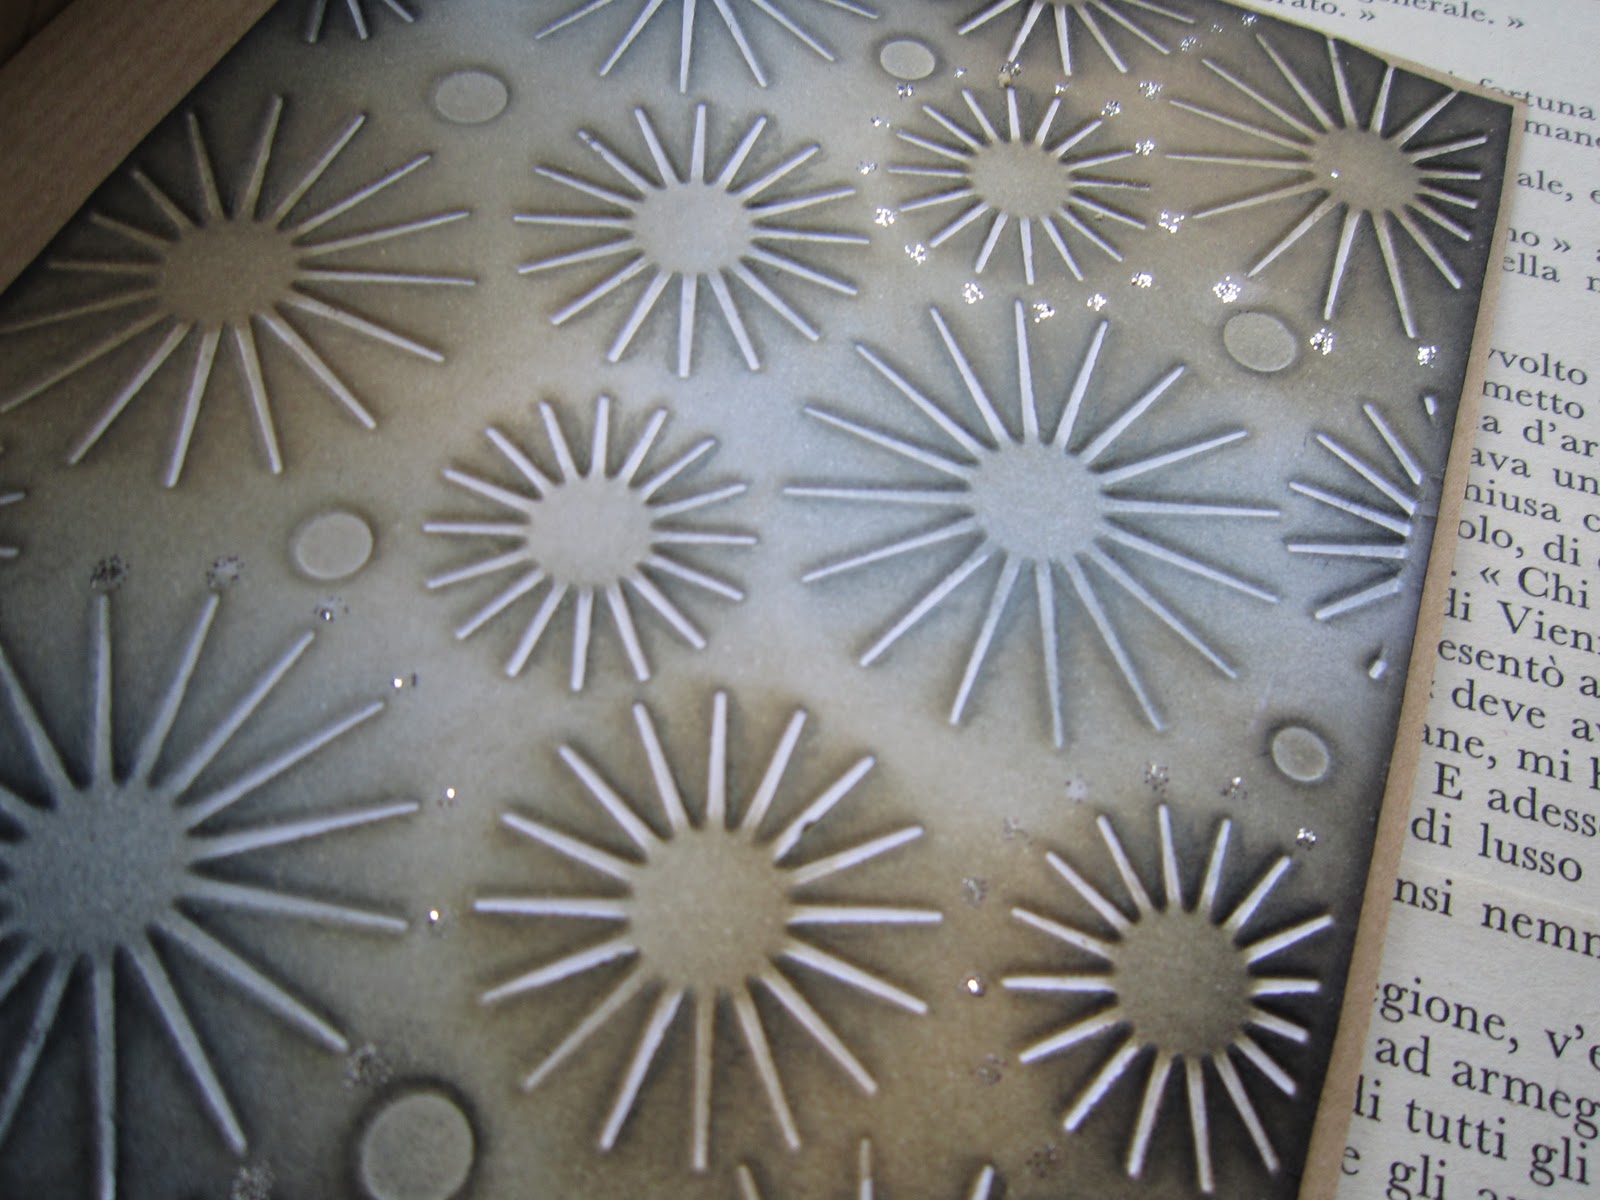
Here are the last of my Christmas samples. First up is another Cabinet Card pennant:
 this time I embossed the pennant (made from mount board) with the Sizzix 'starry night' embossing folder (see this post for more details.. or just scroll down - its in 'christmas part 2'), coloured with distress inks, distressed with water, added a bit of bling with 'frosted lace' stickles - gotta love those for subtle accents of sparkliness!  'frantage' embossing powder around the edge and I covered the big iron work star (under the rosette) with the same - love that embossing powder! So much so that I applied it to the edge of the rosette too - blinging it up!  It is christmas!!

So the pennant is a bit distressed but the next sample I made is more shabby chic but without much shabby! lol 
This sample is just.. erm.. well.. hhmmm.. pretty, yep its pretty.  I wanted to do something with the rosettes other than sticking them onto something and so I made a hanging decoration:
The main rosette (slightly larger that the die made rosettes- this one's made using a Martha Stewart scoreboard) is made out of Tilda double sided paper - such a pretty spotted paper - lovely soft blue. Its topped with a book text rosette & another ironworks star/snowflake (I'm getting a lot of use out of these dies aren't I lol)
On the other side of the rosette is the pretty rose print, all the fixings of the rosettes are hidden by another rosette, and a Martha Stewart snowflake - bought last year & I still love it!
All blinged up with stickles and a self adhesive gem!
Pretty!

This is the decoartion from the side showing the layers of rosettes:

Once our tree is up - scheduled for the weekend - I'll take a picture of it on the tree....

I'm off to watch my youngest nephew in his Nursery's play - he's 3yrs old and very cute - I may require tissues....  Its all getting very christmassy!!

Wrap up warm and have a nice day..

PS before you go - maybe you could help me - I'm putting together a 'christmas alphabet' any suggestions for the letters v-z??  Please leave any suggestions in the comments! Ta muchly in advance  :o)

PPS - Just a reminder: 100 followers or over on this blog by 2012 and there will be a give-away!! 
I'm just going to mention this every so often, not every post, or it'll start to sound like nagging! lol
Share:

7 December 2011

WOYWW & Christmas(ish) part 3...

Here's my desk this week with general stuff on it including a new, nice, clean, & uncut craft sheet... & the address book because I've written all my christmas cards - and before you're impressed that on 7th December I've finished my cards - don't be because I bought them!  And it was very liberating - I'll make family & hubby's but all other are shop bought.
What I'm seeing in the photo is no difference to the state of my desk even though I spent a good couple of hours the other day re-organising it... how depressing.

Earlier in the year I helped clear and organise the White Shed at PaperArtsy HQ... anyone else think Leandra should/could come over and help clear my work room?
Lets vote - raise hands please...
Right, I'll call her..
ooh, hold on... what's that you're saying at the back?
You'd rather she spent her time bottling paints and pressing rubber than clearing up someone elses mess?
oh, OK fair point..
I'll tidy up on my own - seems right - it is my mess afterall... lol

I'll be round for a snoop later on...  and if you have no idea what this WOYWW is all about go HERE and all will become clear..

And now for something much prettier than my desk:
Here's a decoration I made using a whole lot of Tim H's stuff (not something I normally do).  A vintage cabinet card turned upside down makes a great penant and the circular part cries out to have a rosette mounted onto it.  Then there' a Hero Art stamp, distress inks, Adage tickets, ball chain, and memo pins (they're trickly little beggars aren't they! lol)


I have something else christmassy to show you tomorrow...

Please 'follow' the blog (over on the left-hand-side - I'll be a happy little blogger if I can get up to (or over!) 100 followers by 2012... in fact I'll be so happy I'll have a little blog-give-away in celebration!
Share:

5 December 2011

Looking like Christmas, Part 2

Better pic's of the Craft Barn samples.. This is quite an unusual colour scheme for christmas cards but people liked the colours so here they are, but unfortunately the camera isn't picking up the shimmer on the backgrounds or the shine on the embossing.. :
Tag with embossed snowflakes/stars/fireworks (quite a versatile background I think...), and paper die cuts inked up and embossed with the Stampedous 'aged silver' embossing enamel.

EDIT:  The embossing folder is by Sizzix and is called 'Starry Night', its a set with 1 12x15 folder (the stars), a sentiment folder - used on the flourish card, and 2 small motif folders - its a favourite of mine!

 I think this might be my favourite card - but its a close call between this and the one below...
The inside background is the debossed side of a white piece of card coloured up with distress inks, while the front of the card blank has the embossed version (I simply turn the embossed piece of card over & use which one suits) - love the background:
I like how the card has a short front so the inside and front panels can be seen together, several layers - and I'm loving those flourishes - expect to see those in a lot more projects.. lol
(the sentiment on the card makes me want to sing the song its taken from - but I'll try not to do that too often or in public....)
Share:

Its beginning to look a bit like Christmas!!

On the first Saturday of each month The Craft Barn has in-shop demonstrations and this month I was providing one of them... I had a lovely day, lots of lovely peeps came and watched the demos - bought the products I was demo'ing which was great - but in the afternoon it meant that it was as much an improvisation as a demonstration! lol
Here are some sneak peeks of my samples - a few of the originals will go to the shop...
Lots of techniques & products on these - Rosettes - created with Tim Holtz die (I think I've mentioned before how much I like these! lol); Distress Inks (antique linen, frayed burlap, weathered wood, black soot); dry embossing - with Sizzix folders - these give a really good deep impression; die cutting - Spellbinders - great flourishes (love); and wet embossing - covering the die cuts making them look like metal - this effect was achieved using Stampedous 'Fran-tage' embossing enamels in 'aged silver' and aged black (which is a really lovely colour.. we're talking reeeeeeally nice! (& so is the 'aged silver' judging by how fast it sold out!)
Thanks to everyone who watched the demos, I hope you were inspired.  Demo's wouldn't be the same without you!

xx
Share:

4 December 2011

DECEMBER!!!

... and when I say 'December' followed by lots of exclamation marks its a not in a 'ooh December, how exciting!' type way.. no, its more of a 'ooh December!! surely not! where did that year go!' type way!! lol

but anyhooo.... its here and so we'd better get busy with:
*  the christmas decorations (still in garage, not on tree),
*  the christmas cards (that will be bought this year rather than made)(oh the shame! but I'll make the 'important' ones)
*  and the general merriment and festivities that the season brings... yay!!

I finished the small flower ball I mentioned in the last post, and here it is:
This was created with 2in squares of book text - very fiddly! lol  and to finish it off I glued pearls into the centres. This will go on the christmas tree I think... (not that I've thought about the colours on the tree this year... tho I am liking the fact that all the decs are in the garage rather than in the attic! much easier to get to! lol)
Here are the two balls together - showing the difference in the size.. I think I've got these out of my system now... fun to make..
Share:

30 November 2011

Paper Engineering, Part 2....

I recently started to follow Phiona Richards (@rarenotions) on Twitter (quick question - what did we do with our time before we tweeted? lol - don't bother answering...) who made/showed something that reminded me of an origami flower ball that an NCFE Student at SACC made a few years ago and it prompted me to make one (it was on a 'must try that when I get 5 minutes' list that was tucked away in the recesses of my brain), and here it is in all its origami-button-embellished loveliness.. really happy with how it looks - all 12 flowers, 60 petals of it!
Phew thats a lot of folding and sticking!


Loved making this - great project for making while you're sitting in front of the tv, folding & sticking, folding & sticking...
I really like the button centres....
This flower ball is made from 4in squares of paper, I'm currently working on one where petals are made from 2in squares - teeny tiny - I'll post a picture when its done. ;o)
On twitter, where I posted the pictures yesterday, people asked for instructions (waving at you Jean!)- the flower ball is not my design and I found the instructions on the web - there are lots of them out there - this is the one I used:
http://folio-love.com/diy-2/diy-paper-flower-tutorial/  This is the instructions for the flowers and then I guessed/played/looked at photos of how to stick all the flowers together to form a ball - which is quite easy to work out (or there may be another tutorial out there for that.
Share:

29 November 2011

Paper Engineering, Part 1: Me, Martha & some sheets of paper....

I love a bit of paper engineering - I find it relaxing (when it works!) - the methodical manner in which the pieces are cut and pieced together..
a couple of weeks ago I tweeted this:
I made it using the Martha Stewart 'party crafting template' a great tool which gives guides for cutting the individual pieces - no measuring - LOVE tools like that - its not that I'm a lazy crafter but if there's a tool that makes life/crafting easier then I'm interested!
This star was cut from one of my favourite papers - My Minds Eye - spots on one side and typed text on the reverse - LOVE! and I love how the star turned out - much nicer than the similar star that turned up on the front of 'Making' magazine the following week! lol (in my opinion anyway! lol)
The star measures 16inches top to bottom - I'm going to make some in a single colour to go on the christmas tree - I know 16inches sounds big for a tree decoration but the tree is 7ft tall, and it'll look great with these wooden snowlake decorations that we already have:
I think they're about 8-10inches - I really like big ornaments on a tree (as well as the little ones) statement pieces!
Share:

Where do I start!

Its been a while since I posted - again - and lots as happened and I'm not sure where to start soooo
lets start at the very beginning
its a very good place to start
when you read you begin with A.B. C..
When you craft you begin with.....
Paints from PaperArtsyyyyyy
Those clever-paint-making-wizards at PaperArtsy have expanded the range of Fresco Finish paints - I love these fantastic matt finish acrylic paints - if you haven't used them before get yourselves over to the PaperArtsy site - HERE - and buy some - you won't regret it!
 The new colours are brighter but still have the lovely matt finish and some are Translucent which means that you can layer them up with other colours, or paint over the top of a stamped image and that image will show through... genius - its made the range of colours really versatile.

Loving using stencils with stamping - something I used to do but have moved on to other techniques (like we all do) - so happy to be revisiting it - thanks to Lynne Perrella & Leandra for the reminder and inspiration.....
The above tags are samples I made when I demo'd the Fresco Finish paints (& PaperArtsy stamps) at Birds in the Barn (Marks Tey, nr Colchester).  I had a nice time demo'ing, talking to customers, and putting faces to names - waving at you lovelies Tina & Shirley! lol
I have a couple of days of classes planned at the shop in the New Year.  Hope to see you there.

So thats the update - I have a few others but I'll save those for another day...

xx
Share:

16 November 2011

Project of the Day :: Wrap it Up :: Banana Frog

Typepad is not in a happy mood and is not letting me load up my Banana Frog project of the day - so I'm blogging it here and linking across - so instead of the usual sneakpeek I show on here this month you get to see the whole thing! (I need to blog it somewhere and here's as good a place as any! lol)

My project of the day is made with three things in mind:
1) Attacking the stash
2) Recycling
3) Gift Wrapping - christmas is only 40 days away!!  :o)

Through the year I've bought several packs of Sizzix Embossing folders and they come in clear plastic pillow box - no printing or embossing on them - great for recycling! :o)
I got out a couple of my favourite Banana Frog sets - Backgrounds & Cake Greetings:

I cut deep strips of paper - about 9x30cm - and stamped along the length to create a decorative background.

Then I punched some decorative borders and attached them to the back of the above strips.
I stamped up a greeting strip and stuck that on top.
I'm still working my way through the pile of rosettes I made a while back so picked out ones that worked with the colourschemes and used them as a focal point for the wrap.
I stamped and punched motifs & attached them to the rosettes that I then attached to the wrap with glue dots.  I wrapped all of this around the plastic pillow boxes, added some bakers twine (love!) and stuffed with tissue paper.
I really enjoyed making these - reduce, reuse and recycle - and are such a cute way to wrap something.  All they need now is a gift inside.

For more details on Banana Frog products go here: http://www.bananafrog.co.uk/
Share:

2 November 2011

WOYWW....

Good morning all you lovely snoopers! lol

What's on my worktop this week - well not much really so you can actually see the worktop (fanfare please!):
BUT, the only reason the desk looks this clear is because I put all the cr*p, ahem, sorry the box of lovely bits of paper I'm saving for later(!) on the table in front over here:

see, now I'm just spoiling you - thats two desks you can snoop around if you feel so inclined!
& check out that box of lovely PaperArtsy Fresco Finish paints! and there's new colours bottled and waiting - how excited am I?!?!  I've seen them- and I want them.. no I neeeeed them....

OK, that's quite enough - off you go to snoop elsewhere... I'll be around for a snoop tour later

(ps.. I'm quite very embarrassed at how unorganised and messy my room looks - I'll be around for a snoop once I've cleared up (cleared out) my stuff (hhm so that could be next tuesday)... now where did I put the rubbish sacks...)
Share:
Blogger Template Created by pipdig