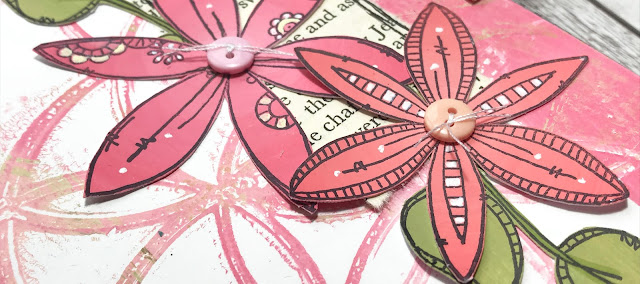
Mixed-media paper crafter; stamper, freelance craft tutor, designer of PaperArtsy JOFY stamps

29 January 2018

JoFY Bingo Wk.3


Foliage and festive seems to be the themes of this week's Bingo draw of numbers 12 & 28!

I didn't go with either of the themes of the stamps sets but I did embrace the 'fun times' sentiment...

I've always thought if you turned the long blue bauble (JOFY28) upside down it would make a great base for a clown - and that's what I intended to do... but then I started thinking and playing and this happened on my desk... a monster mash party! lol   They come 'alive' as soon as you add the googly eyes! (and you can't not smile when you see/use those!)


I reigned them in and created this journal spread - I had so much fun creating this!  Flowers and leaves used as body parts (I'll leave you to spot which go where) and baubles as bodies... Lots of masking off and paper piecing were used to create this..

I call this little fella 'Fancypants Fred' - he's wearing his best party clothes and blue suede shoes and is strutting his funky stuff!

...but he's not alone.... (the eyelashes are so cute!)

I didn't forget about the bauble/clown... but those of you with a fear of clowns might want to look away now.. lol  (I think it the googly eyes that make this one a little worrisome! lol)

This was fun - I even added a little 'watcher' to my day book...

(Jo: put the monsters down, move away from the stamps!)

I made monsters out of the flowers and baubles but seeing stamps in a new way doesn't have to be this extreme - how about stamping the flowers out and building them up to form a bigger flower... just sitting and playing with them can create some fun things.


If you are inspired to join in here are the 'rules'... (they're more like loose guidelines really...) :o)

The numbers are drawn on Monday, along with a project I've made using the corresponding stamp sets, then the plan is to:
  • Use/combine 2 stamp sets (use only those stamp sets - not all the stamps in each set - that would be too much of an ask but as long as there are one or two stamps from each set then its OK!)
  • 7 days to create 1 project, makers choice:  cards... atc... journal page... dimensional project... tag...
  • Use any paints/media, colours, embellishments, stencils/masks
  • Load up your project to Instagram any time during the week.  Please use Instagram links #jofybingo and @jofyjo in the text (not 'tagging' me please) so I can find it :o)
If you don't have an Instagram account you can add your make in the comments on the Facebook post linked to this blog post (facebook links:  https://www.facebook.com/JoFY.JoFirthYoung/ or https://www.facebook.com/jo.firthyoung )
I hope you can join in - I look forward to seeing what you create!


Share:

25 January 2018

All that glitters....

I may have mentioned before that I like a bit of sparkle and shine, and today its all about the SHINE!


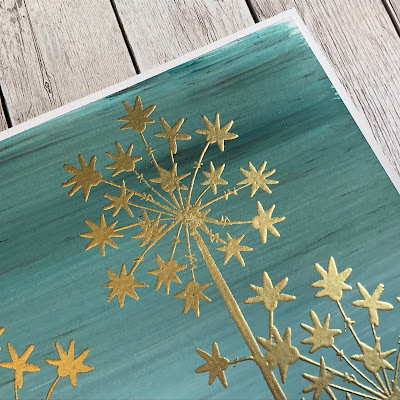
I made several cards featuring the seedhead silhouette from JOFY63.  They are the same but different - on each card I used simple clean and simple layouts and the same embossing powder which was WOW's Metallic Gold Rich Super Fine - very lovely & great at keeping the delicate detailed line of image.

I think I like kraft as much (probably more) than I like shine! I like to team them up & I was keen to use the silhouette stamp solo on a card :

The second card I made teamed the silhouette seedhead with the original line drawing from JOFY38 on a white background. 
Very happy with how they look together! :o)  (its like I plan these things! lol)

This is my favourite of the three cards.
I painted an ombre background using Infusions (A Bit Jaded) on a wet Fresco Finish (Mermaid) base and brushed it in - how GORGEOUS is that background!  even before the seedheads were stamped and embossed on top! swoon!  I really like how the different colours in the Infusions become lines across the panel - especially the dark slashes which are the walnut stain powders.

Here are the cards together - great to see how they are the same but different... I would happily frame the Infusions one and put it on the wall!

Thanks for visiting!


Share:

24 January 2018

JoFY Bingo W2.. part 2...

... I made a tag for JoFY Bingo W2 but wasn't happy with it.

The perspective idea of the tag got me thinking... so I altered it 'slightly' and now the tag looks like this:

I didn't want to create something brand new simply alter what I had. 

I wanted to create a diorama card.  To do this I measured the tag and drew a rough plan - and I mean rough - previously I've made diorama cards by creating separate layers & adding inside but this time I wanted to use the concertina method so my sketched plan was just to remind me of the measurements needed and, as I wasn't referring to any books or previous projects I was working blind - by drawing it out I could visualise what was needed for it to work.  

The structure is a kraft card 'wrap'/box-like structure attached to one long edge of the original tag and folds all the way round and attaches to the other long edge of the tag. Here are the creases needed to make the concertina folds for the 'hills' that you can see in the top photo.


Once the kraft card was scored I cut the appropriate height and cut an aperture in what would be the front - I folded all the score lines before die cutting because it made it easier to position the die.

I cut down the tag and attached it to the kraft card - the project was evolving as I was making it and so positioning of items altered as it went along & you can see from the photo below I had to raise the height of the tag to get a better position of the shed.  This wasn't too concerning because the resulting gap at the bottom would be hidden by layers added in front.

The diorama has four layers, counting from the back: tag is layer 1, layer 2 with small flowers, layer 3 with medium flowers, and layer four is the front (wrap-around) layer.  I couldn't salvage any of the 'grass' from the original tag so I painted/stamped a panel and cut it up to create 3 layers of grass - 2 for the internal layers and 1 to be added to the front of the card.

I salvaged all the flowers and leaves and attached them to each layer (closing the card each time to check positioning).

To close/construct the card I built it from the front backwards using the strong red line doublesided tape. In the photo below I'm holding layer three ready to attach it the front of the card.  The card is fixed in place by attaching the kraft card to the reverse of the tag - bit tricky!

In the photo below you can see the different layers:


ooooh its like a makeover TV show:...

.. the tag went from this:

.. to this:

I'm much happier with this project and I've created two projects for the price of one!! lol

Aaanyhoo - I look forward to seeing any projects you make this week. (go HERE for a reminder of the latest Bingo numbers and what its is all about!)


Share:

23 January 2018

JoFY Bingo Wk.2


This post is a day later than planned due to the small matter of a stamp release yesterday!

OK, back to business (well, fun really!)  JoFY Bingo Week 2!! This week's numbers are shown in the photo above and corresponding stamps sets look like this:


Beach huts are basically sheds (nice sheds!) on a beach... so for my project this week I've brought it off the sand and into the garden...


I was aiming for a scene with perspective - large flowers in the foreground and the shed and row of flowers in the background & seemingly further away.

To create the scene: Using JOFY16: the beach hut became the shed, the bucket and spade became garden pots; from JOFY22 the flowers stayed as flowers; and from JM22 the vase of flowers became a row of flowers in the distance - they were a perfect size!


The tag measures 21.5x10.5cm (approximately 8x4inches) which is a good size for building a scene onto.

I hope the stamp choices have inspired you to join in - if so here are the 'rules'... (they're more like loose guidelines really...) :o)

The balls/numbers are blogged on a Monday, along with a project I've made using the corresponding stamp sets, then the plan is to:
  • Use/combine 2 stamp sets (use only those stamp sets - not all the stamps in each set - that would be too much of an ask but as long as there are one or two stamps from each set then its OK!)
  • 7 days to create 1 project, makers choice:  cards... atc... journal page... dimensional project... tag...
  • Use any paints/media, colours, embellishments, stencils/masks
  • Load up your project to Instagram any time during the week.  Please use Instagram links #jofybingo and @jofyjo in the text (not 'tagging' me please) so I can find it :o)
I hope you can join in - I look forward to seeing what you create!


Share:

22 January 2018

New Year = New Stamps!

Welcome!


I LOVE designing new stamps and stencils, and this release really makes me smile!  I think this might be my biggest stamp and stencil releases since my first sets in 2012 with 6 A5 stamp sets, 8 mini stamps and 10 stencils in 3 different sizes! 

Over on the PaperArtsy blog this evening you can see all the products with samples made by me, followed by two further blog posts featuring samples by my FAB.U.LOUS wingmen Keren Baker and Clare Messenger They have been BRILLIANT and I'm so grateful to them for all their hard work and creativity - I couldn't have done this release without them. They have posts on their own blogs tonight too so please visit and take a look (click on their names to go to their blogs). 

LOTS of thanks of course, as always, to Mark and Leandra at PaperArtsy for being so very brilliant at doing what they do!

OK, grab yourself a drink, settle down - here come the pretty things....


JoFY59

JoFY60

JoFY61

JoFY62

JoFY63

This journal spread was created with the stamps from JOFY63, using the smaller of the images as focal points - you don't always have to put a flower head on a stem!  :o)


LARGE Stencil:  PS083

JoFY64

LARGE STENCIL:  PS082


Minis!


LARGE STENCIL:  PS081

This is a really useful stencil - I used it as a background for my doodle mushroom card and I wanted to show it to you without the stamping and paper-pieced mushrooms. Its nice to have a stencil which is quite tall but delicate at the same time.


REGULAR STENCIL: PS084


This stencil is great to use as a base for doodling - this spread in an A6 journal used 2 colours (Slate Fresco Finish and Jane Davenport Paint over Pen in Bali Blue.. and a touch of white gel pen (or course!)) and took around 15 minutes to create.


REGULAR STENCIL: PS085


This is one of the gelli print spreads I mentioned over on the PA blog post.  It uses PS085 and stamps from JOFY63.  I think the right hand page looks like batik tie-dyed fabric and is created by having a 2 colour gelli print onto the off'white pages of the journal.


REGULAR STENCIL: PS086


The two spreads below are taken from my gelli print journal - the first one uses the first pull of the print and the second using clean up/ghost prints... creating very different pages.

These pages are created with PS086 & flower stamps from JOFY62 - they work well together because they have the same geometric design construction.
This second spread using the PS086 has a very different feel - mush more distressed which was inspired by the ghost prints of the background.  I used mini stencil PM011 and mini stamps JM58 & JM59, the text strip is from JOFY63.  (The words are created using PaperArtsy distressed alphabet  'WORDS 2' (W2) a really useful alphabet.)

MINI Stencil: PM011

MINI Stencil: PM012

MINI Stencil: PM013

MINI Stencil: PM014


I hope you've enjoyed this (mammoth) blog post about my new JOFY designs - I hope you like them as much as I do and you're inspired. 

I'm really looking forward to sharing the projects I have planned with these new stamps in the workshops I have booked around the country - you can see where these are by tapping the 'teaching dates' button at the top of the blog.

I look forward to seeing you there!

Thanks for visiting!


Share:
Blogger Template Created by pipdig