Mixed-media paper crafter; stamper, freelance craft tutor, designer of PaperArtsy JOFY stamps

14 October 2016

ACP:2 Black + S

This month's colour is Black, and as we all know Black goes with everything! and so for that reason my first project this month is a colour free-for-all -  anything/everything goes - literally!


Each day this month I have spent 15 minutes working on a project  - just a...
  • no hassle
  • mind clearing
  • getting in the mood to create
  • clearing the workroom
  • using up the scraps
... sort of project... and it fits in nicely with first letter of this month: the letter S, because S stands for scraps,  scrapbooking, sewing... oh and stenciling & stamping!

When I make a project I always cut extras ('just in case') and keep the left over bits and pieces,these end up gathering in a box or clear file... well enough is enough.  I am being ruthless and firm with myself : STOP SAVING THE SCRAPS (ooh look at all the lovely Ss in that sentence)


Now you might think the pile (imagine I'm saying 'the pile' in a deep scary voice with echo lol to give it gravitas) doesn't look too bad - but remember its a PILE there's plenty of bits and pieces under what you can see - and for size perspective - the cards you can see in the top right hand corner measure 6x4inches.

My project/plan is to make a card every day in October, and extras if I'm in the mood... I didn't set myself any rules or guidelines (why make things hard for yourself) (not even deciding on landscape or portrait! big step for me! lol) except that:
  • Every card must use at least one piece out of the scrap box/from the pile...
  • Nothing new can be bought and used - whatever used must be IN my workroom.
Simple!  I love the challenge of this - making (hopefully) something special out of scraps... and adapting items so they can be used (such as die cutting letters or shapes from the random bits of card that are in the pile..)

Oh, and anything left over at the end of the month will be thrown away.

Here are the cards so far:


I love the little monsters Elena has designed for PaperArtsy (you can find them at www.paperartsy.co.uk), and having used them on my nephew's birthday card I couldn't resist adding one on this page.


The die cut apple above has been in the pile for aaaaages - looks great on this page!  On the right is a ghost print cut from one of the underpapers on my desk - definitely too nice to throw away!

Bit of a motivational page here - and for some reason I seem to have quite a few of these cupcakes in the pile.
Love this page - I wanted to use bubble wrap on a page which has been used to gelli print - always great colour blends left behind so thats what I put on the reverse (on right)

Photos printed out on polaroid style film - I really like the dinky little prints..


A very funny evening watching Nina Conti, the ventriloquist, at the Cliffs Pavilion - really clever too... an evening that was so funny you have tears running down your face.

These shoes are stamps from JOFY43, the 'boy' plate - works really well to illustrate how much walking we did that day!

 There had to be tags and book text in there somewhere!

I wrote on this page but it wasn't important (so I don't mind that it is barely visible) - I wanted the embellishments to be the focus.... it doesn't always need to be about the words..

From the photos above you can see the pages are all bound on BIG book rings... They are in a book I created from a book cover I had in my room - yes I really did have an old book cover stashed under the desk just waiting for the perfect project! (you can see how long I've had it because my name is written on it - my maiden name - I've been married 11 years!)

 I think I had originally used it for altered book techniques.. and removed the pages at some point...

I punched some holes in, made sure the book rings and pages fitted and painted it all over - front and back- with black gesso - LUSH!

Went 'old school' and dug out the hammer and eyelet tools.. which were sadly not man enough to go through the book covers...  This book rin and book cover is a binding method I've used before and like very much (you can see another project HERE) and I found it on Julie Kirk's blog (HERE).

I needed to bring out the big guns! I don't use the Crop-a-dile Big Bite very often but I am very glad I have it- so easy to punch through the book covers and set the eyelets.

Here's the cover in-progress - using a card that I'd painted way back at the start of the project - I thought it would look great on the cover and reflects the contents.  The only number you can still see on the ruler running along the bottom is '22' which made me smile - as that's my birthday! Coincidences like that make me smile!

The cover a little bit further along:  I embossed the tips of the seedhead (WOW, silver sparkle), bubble wrap printed randomly, drew around the edges in grey pencils, added spots of Mermaid to break up the Chalk bubble wrap print.... all glue down but it was still missing 'something'....

I added a title and date and it is finished.

15 days to go....
(and just in case you were wondering - I've used 72 pieces from the pile)


Thanks for stopping by.

x
Share:

1 May 2016

ACP:2 Pink + H

I'm not going to beat around the bush - H is for HEXAGONS!!!


I'm slightly obsessed with hexagons at the moment!... ok, in truth its been while now... punches, dies.... gelli plates - boxes:....

Look at these lovely hexagon nesting boxes I bought on the PaperArtsy stand at AllyPally... I've temporarily put my kokeshi dolls in them to illustrate the size (tallest doll (in black) stands about 17cm) - I like them A LOT (both the dolls and the boxes lol)!!  The shape is so on trend at the moment and these boxes make for a more interesting display than square boxes - not that I have anything against square boxes of course...


A couple of  years ago there was this scrapbook page... (and the quilt that inspired it..).. lots and lots of hexagons! (the patience my Mum must have to have hand sewn all those!)..


OK, so Hexagons are my theme for the last part of April's Pale Pink month (and yes, I am aware that its now May - where is this year going!!!)... I chose to use the colours below with the hexagons... (I didn't actually use the pale pinks but have put them here to illustrate the palette I'd chosen)(and I actually picked several other paler colours as the project progressed)
I like the look of pale pink with pale blues and grey (pink and grey together look great on their own, and in my book Slate/dark grey goes with EVERYTHING)

This is the finished project.... or so I thought... the more I looked at it the more unfinished it seemed... (you'll see what I mean later)

Let me show you how I made this - its not overly complicated...  The substrate is a 10x14in board canvas - this is quite big for me - I'm itching to go bigger with projects but I'm doing it gradually :o)

Painted the canvas with a wash of slightly diluted 'Space Cadet' paint
I didn't want a 'solid' base coat and so I broke it up by removing the paint 'ragging' stylee - ie crumple up a piece of kitchen roll and dab the surface.... 
I decide this was too dark so I added paint (Hint of Mint) using kitchen roll again.... 
Still not happy with it, I added some 'Chalk' and 'Slate' ... the kitchen roll was being used a lot for this project...  I really like how this looked (the photo below is a close-up) started to have lots of lovely paint layers and texture... but its now what I wanted so..
I painted over the whole piece with a wash of Antarctic' and 'Chalk Fresco Finish paints and laid on the die cut pieces of pink patterned paper... 

but it still felt too dark so I repeated with another wash of the colours...

I laid the pieces on again and now I was happy...  I think its important to keep checking (if its possible) how the different layers are looking and working together as you go along... because you can then tweak colours, finishes and layouts... 

The stencil I'm using is from Artemio - I love it because its so big! (Its the one I used on my suitcase HERE )  I laid it on, checking that it worked with the position of the pattered hexagons

It would bother me if the hexagons weren't straight (!) and so I drew a pencil line down the canvas as a guide to line everything up to

...and glued them down. I'd always planned to cut the hexagons off at the canvas edge but I really like how they look hanging off the edges...

I stenciled the flowers in Slate - I like the bold contrast - black would've been to harsh...

To finish the canvas off I die cut the word 'Hope' (using Sizzix Serif Essentials dies) and painted it with Slate to coordinate with the stenciled flowers.  I dry brushed Chalk around hexagons - over the edges and onto the canvas to halp blend the two surfaces, and then I used a Grey Stabilo All Pencil to draw around the hexagons to give them a bit of depth.  I dragged the edge of the canvas in Slate.  The word 'Hope' was attached to the canvas using 3d foam.

Here's the 'finished' canvas again..

which I liked but felt it was missing 'something' down the left hand side... I wanted to write on it... in my head it was turning into a BIG journal page of sorts - what does the word HOPE bring to mind... what do I hope for?? (I think it about here that I occurred to me that HOPE begins with H which is letter of this post! lol I'd like to say I planned that but it was happy accident!)..
I couldn't bring myself to just write on it... Its a canvas, something to go on the wall - that little inner voice started up: what if its not straight? what if it looks 'wrong'? what if writing on it ruins it!???
So my husband had the 'brilliant' suggestion of writing the words onto acetate and laying it over the top of the canvas to get an idea of how it would look! That was a fine idea!

Biggish writing.... thickish pen... not really liking that...

What about if I wrote IN the hexagons... no, I liked that even less! lol 

Then  my husband suggested just single words ... die cut like the main word.... another great suggestions - he doesn't often suggest design options/ideas but when he does they are good - he was on a roll!
I dug out my QuicKutz dies (going old school here!) - the perfect size! and so quick and easy to use with the Big Shot!

I cut words out - 'eternal' 'weather' and 'well' using the QuicKutz dies and then 'Cure' using the Word Play die from Sizzix (I wanted that word to be bigger)  I painted these words in a mix of Slate, Space Cadet and Chalk - I didn't want these to distract from 'HOPE'. These words were glued flat to the canvas surface and I wrote phrases and journalling around them in grey felt tip pen - white was too pale, and black would be too strong/bold... I didn't want the handwriting to be too obvious.

Here is the finished canvas (yes, now definitely finished!) 


Woah that was a long post!

Thanks for stopping by - and as its now May I'll be moving onto a new colour and 2 new letters very soon.... 

xx
Share:

19 April 2016

ACP:2 Pink + G

Lots of lovely options for the letter G but I decided that G is for Gelli print!!...

I really enjoy playing with the Gelli® plate - I recently demo'd it on the PaperArtsy stand at AllyPally - there I used medium sized plates but for this ACP:2 blog post I went large - A4 size - and because my colour for the month is pale pink I picked a few pale Fresco colours and the Gold - Pale pink and Gold is such a lovely combination....
I had a lot of fun with these - this time I haven't created a stand-alone project but several background pages that I can imagine being cut up and used in journals or on cards....

I blended gold through to pink and took a print and a ghost/clean-up print... sometimes the ghost prints have a more interesting texture..
 

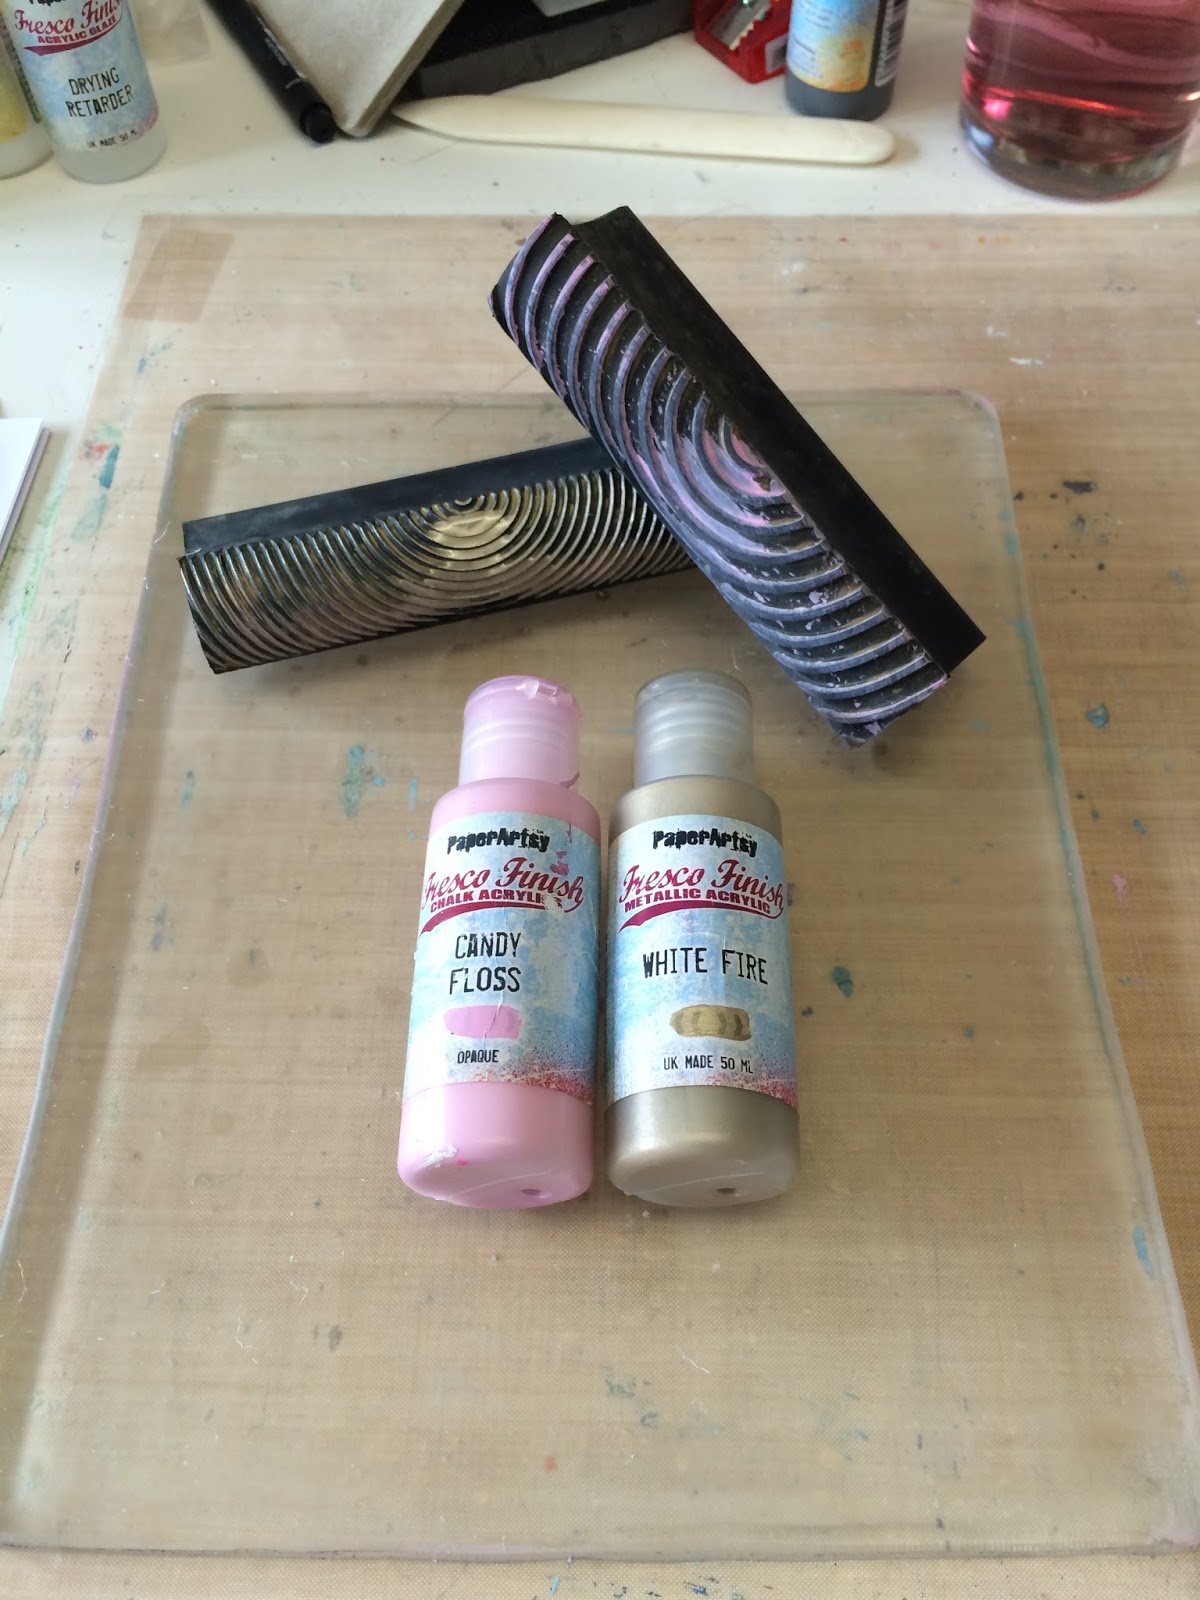
...and then I had a lightbulb moment... could I create a woodgrain effect on a Gelli® plate using one of my old interior decorating tools??.....

yes I could!! LOVE these prints!  A pink base layer with gold textured top layer

Here is the main print (centre) and 2 other ghost/clean up prints
(I'm also thinking how great this would be with a pale teal base layer and gold top layer)

Several pulled prints later I decided to create a multi-coloured background - several colours placed randomly onto the plate surface and then blended together with a brayer....


I placed several stencils and masks on to the surface - trying not to overlay each other too much but not leaving any blank spaces either..


and these pages of prettiness are the result... the left hand page is the first print, the second was created after I carefully removed the stencils and pulled a print off the remaining paint on the plate - both are lovely... imho


That is G for the ACP:2 project dealt with - short and sweet - I can't tell you how long its taken me to write this blog post
(well you can see how long - its 9 days overdue!... I kept starting and stopping, & starting again... and stopping... and starting - and oh well.. you get the idea!)

-  -  -  -  -  -  -  -

While we're on the subject of Gelli® prints.....

Here are the samples from AllyPally where I demo'd the Gelli® plate with PaperArtsy's Fresco Finish paints...

A last minute change of plan on the day meant I needed some different equipment and Clarity Stamp had the PERFECT solution! (THANK YOU!)  They have these BIG acrylic plates which are designed to fit the different sizes of Gelli plates...perfect!! (and of course are great for using with oversize stamps!)


These really were a godsend!  When I'm using smaller Gelli® plates I often take the plate to the page rather than the other way around (especially when creating a tiled effect) and so I need something to put the plate on to keep it stable/rigid and these are ideal!   I recommend them and you can find the HERE on the Clarity Stamp website... 

Lots of samples using stencils, bubble wrap.. creating positive and negative prints - so many effects you can create with a Gelli plate but I kept it to one or two layers for these demos...


...and when you're creating prints you need to clean your plate and roller - I do this in a couple of junk journals I've created - great way of creating messy backgrounds...


In preparation for the show I played around with the new small Gelli® plates which come in sets of 3 shapes - hexagon, rectangle, square, circle, oval and triangle.... (my favourite being the hexagon - obviously!!)....
I created a little book with all sorts of different printing options... just a little prompt book really.. a fun thing to create while getting used to using the small plate size.. and useful too - I'm going to keep mine with my gelli plates...

Here are a few of the pages.. I used to paint colours for this book so I could concentrate on the prints and not be distracted by colour.


I'd really recommend making a little book like this filled with samples and notes - do's and don'ts - its not perfect but its very useful, & handy to refer back to and maybe inspire yourself.

If you have a Gelli® plate (which after talking to people at AllyPally, lots of you do but its still in its packet) play with it, make prints - don't stress - its just paint on paper!  If you don't like a print then paint over it (print over it), cut it up, use the bits you do like... A Gelli® plate a fun useful tool.... HAVE FUN! :o)

and to illustrate the above point.... these 3 pieces started off as 1 A4 gelli print that I wasn't sure what to do with so I cut it in half (top panel)... and on one half I gelli printed Bougainvillea circles, along with bubble wrap prints (a bubblewrap print fixes everything! lol) and a flower stencil print (Gold).... it was now looking slightly ...erm.. well ...vibrant (she says diplomatically while thinking 'gaudy') .. but: onwards and upwards...))... I cut it half again to create 2 A6 panels... and finally trimmed and stamped the panel (bottom right) to create a card.....

The card might not be perfect (& its the brightest thing I've created in quite a while!)... but I wanted to show how you can use what you have and change it into something else - you can still see the original green/blue print but now its just a layer.. not the focus...

That's all for now - I'm off to sew all the Gelli prints I've made into a book... or make them into card backgrounds.... 

so many prints.. so little time!!

x


(Gelli® used with permission. Owned by Gelli Arts® LLC)
Share:
Blogger Template Created by pipdig