Mixed-media paper crafter; stamper, freelance craft tutor, designer of PaperArtsy JOFY stamps

20 March 2022

11/52 Bite Sized Books

Hi

This week's book was a lot of fun to make....

I sewed a piece of spotted paper on to the front cover & doodled simple lines around the spots to make it more interesting.. I didn't intend to colour it but as the colours of the book took shape I felt it needed a bit of colour...

I've been doodling in one of my junk journals recently & one of things I'm really enjoying doing is drawing circles around a feature image to highlight it... so thats how these little scenes came about - they look like scenes from a desert at sunrise/sunset.

I've photographed these two pages together because, even though they look completely different they are the same piece of paper... pale spots on a beige background... on the left hand page I sketched small flowers and stems and on the right hand page I drew line & added colour.. I love how different they look!

This book was made during MS Awareness Week, & as I've had Relapsing Remitting MS for the last 25+ years I thought it was important to acknowledge it some way...
I've been very 'lucky' with my MS & after receiving treatment I'm able to lead my life relapse & symptom free...


Here's the flick through video....


Thanks for stopping by.


Share:

13 March 2022

10/52 Bite Sized Books

Hello

This book bring me up to date with blogging my mini books... week 10 of the #52bitesizedbooks.

I used one of my favourite stencils on the cover - I didn't use additional layers as I've done on the previous covers because I wanted to see the embossed pattern.

There's lots of die cuts in this book - a chance to use new dies - they look different when you're only using little parts of a bigger design.


My new stamps include rainbows/arches - great for layering up to create interesting patterns and assembled pieces.

Cute little Tim Holtz paper doll...

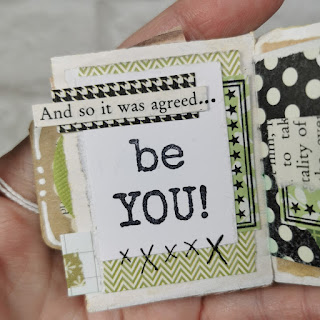
Ha, I totally agree with this phrase from PaperArtsy Hot Pick 16/05.. the Hot Picks stamp plates are always full interesting little motifs and phrases.

Here's the flick through video....


Thanks for stopping by
 

Share:

12 March 2022

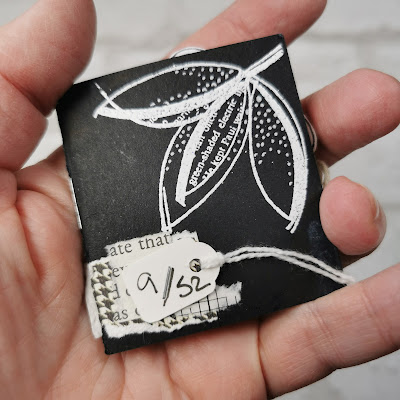
9/52 Bite Sized Books

Hello

Book 9 of the #52bitesizedbooks - first book of March - black, white and kraft seem to be my colours of choice for this book (possibly the whole month) - these are such a great base for introducing other colours.

This book has lots of mark making bits and pieces, doodles with shading and die cuts...


Here's the flick through video...

More info about the products I've used can be seen in my YouTube video that you can find over on my channel.. 

Thanks for stopping by

Share:

14 February 2022

6/52 Bite Sized Books

Well hello!

Today is Valentine's Day - wishing you a 'love'ly day - show yourself some love - drink you favourite coffee, read your favourite book, eat those reeeeaaaally good chocolates while binge watching your favourite show - whatever would make you feel pampered and loved - do THAT! 

Week 6's book has a lovely pretty Valentine-ish feel to it... I didn't intend for it to be like that (it started off with mushrooms!) but thats how it is  - and I like it!

I was going through my dies looking for interesting small ones to use in the books and found these fun Sizzix Tim Holtz Funky Toadstools... I didn't think there was mushroom on these small pages for too many.. get it MUCHroom/MUSHroom... oh, don't worry... I'll stop now... lol  cute dies aren't they.


Nothing scary about a pink, sparkly, googly-eyed skull!  Bet you didn't expect that to come out of the pocket did you?!! 


Lots of doodling on these pages - white and gold on kraft!! love it!

I was looking through my postage stamps - could this one be any more appropriate!!  What a lucky find!

Here's the flick-through video.....


Thanks for popping in!


Share:

30 January 2022

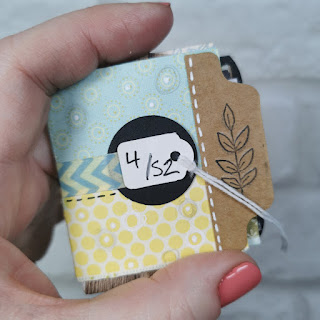
04/52 Bite-sized books...

 Hi

I've just about settled into a routine of making and uploading my #52bitesizedbooks. 

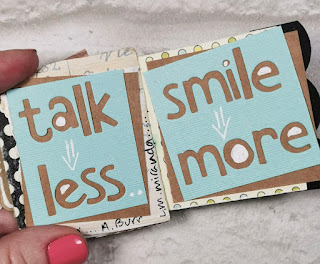
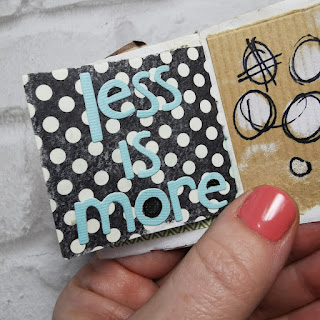
This week's book has a few die-cuts. To create a quote I die cut letters from pieces of coloured card stock and used the panels on one spread ....

and then used the die cut letters on a second page - it was its own sort of anagram - very happy accident!


'Talk less, smile more' is a line from the Hamilton musical - I LOVE that show and the line is such good advice... and each time I read it I find myself singing the following line which is 'don't let them know what you're against or what you're for...' and yes, I've watched Hamilton so many times that I can quote the lyrics.. lol ... thanks to Disney+ (I've also seen Hamilton on stage - a clever, brilliant piece of theatre - I thoroughly recommend it)

Some JOFY stamps made their way into this book to - a christmas star and a quote.... well, it would be rude not to use my own stamps wouldn't it!


Here is 4/52....


Thanks for popping by...


Share:

11 June 2019

Ombre Art Journal pages...

I bought the Creative Expression 'Bluebird Edger' die a few months ago.  Its a clever die - cuts positive and negative elements, the bird's and butterfly's wings are cut so they lift away from the cut panel - its clever.

I made a couple of cards using the die but what I really had in mind to create was a tip in page in my small art journal... and ombre journal spread.

I love how dramatic the die cut looks against the hot colours of the ombre background (Cerise, Coral and Butternut).


I really wanted to keep the clean and simple look of the spread - otherwise the die-cut get 'lost' (imho) and so I only added a few flowers to the left hand page.


These Sizzix Thinlit dies (Wildflower 664163) are great silhouettes.  I added a single stem to the inside of the right hand page positioning it so it couldn't be seen until the tipped in die cut page was turned.


Its a relatively simple spread but it packs a punch!  I might have to try another one - maybe with a vintage vibe...

I'm not sure I ever put the cards I made here on the blog so here they are (just in case)...


Thanks for stopping by


Share:

8 April 2019

Colour puddle card....

... I reeeally like painting 'colour puddles' and usually use them as the base to stamp flowers. I'm always thinking and looking for other ways to use them... when I saw a post on Instagram (linking to the Sizzix blog) where they had used these (very lovely) flower dies as a stencil on cards I had a lightbulb moment... and this card is the result...


I posted this photo on Instagram and said I would put simple instructions here on my blog - 'simple' because it is reeaally simple..


Step 1.  Paint a colour puddle... this is done by painting a circle of paint (going round and round and round until the paint on your brush runs out..) then adding another circle/ring of paint in a second colour and painting round and round and round and round until your paint runs out again - blending the colours as you go...  its very relaxing! 
NB. The photo below shows the colour puddle cut to size to fit the card.

Step 2. Die cut the chosen flower in the bottom right hand corner of the card blank (mine is 12.5x12.5cm)


Step 3. Attach 3d foam pads around the edges of the colour puddle panel.


Step 4.  Attach the colour puddle panel to the inside of the card.

I really liked the clean and simple look of this card... but realised it was a bit too clean and simple! I mean there is such a thing as too much white space surely! lol

Step 5. Cut the white card blank in half and cut the front panel down to fit a 12.5x12.5cm kraft card blank - this will warm the card up and give a frame all around.


Add a strip of coordinating washi tape, a small tag and tiny die cut heart. Still clean and simple but not quite so much.

I wasn't kidding was I when I said it was a simple card - simple but lovely (in my humble opinion! lol)


Thanks for popping by!


Share:

16 September 2018

Art Journaling.. No' 2...

... another journal spread with touches of neon paint (and why not!)... 


I wanted to create a spread using one of my new word stamps (JOFY68) and one of the reasons I chose these particular words is that they can be used at other times than christmas (except for 'christmas' obviously!)

This spread is a bit 'motivational' -  and I like how all the different fonts mix together..

Paint splatters, die cutting, flowers (JOFY62) and some Tim Holtz Small Talk stickers make for a nice less-is more-spread - well, I say less is more but the background is made up of layers of writing (painted over), stenciling, a splattering of stamping, painting around the edges and then the main images.... 

Thanks for stopping by...


Share:

3 September 2018

JoFY Bingo Wk.15


Welcome!  Bingo week 15 - and the numbers 17 and 39 have provided a very festive selection!  (which is handy as I'm still feeling very festive after the release of my NEW JOFY christmas stamps on Friday - you can see them here).


Aaaanyhoo I wanted to make some un-christmassy with the stamps... so I made a gift card and envelope:


I stamped the star border from JOFY17 in lines all over a sheet of black card using Snowflake Fresco Finish paint - its a REALLY good bright white opaque paint.

I cut out a gift bag using the Sizzix die ('gift card bag' ref 662687) - dinky little bag designed for store/gift cards...

I coloured the surface with neon and metallic gel pens...

I stamped the star from JOFY39 onto white card and coloured them with the same pens as the gift bag... 
To create the greeting card I cut a square of the star stamped background, matted it onto green card and attached it to white greeting card base.  I die cut the word 'happy', wrote 'birthday' on a strip of white card and assembled these along with the stars onto the card...

I have several nephew's birthdays coming up and I think this will make a great card design for them!... and it doesn't look at all christmassy (in my humble opinion!) (would make a great 'celebration' card too!)

Thanks for stopping by... see you next monday for week 16 of JoFY Bingo!  

If you'd like to join in with this 'game' - its dead easy - here are the details:

The numbers are drawn on Monday, along with a project I've made using the corresponding stamp sets, then the plan is to:
  • Use/combine 1 or 2 stamp sets (use only those stamp sets - but not all the stamps in each set - that would be too much of an ask but as long as there are one or two stamps from each set then its OK!)
  • 7 days to create 1 project, makers choice:  cards... atc... journal page... dimensional project... tag...
  • Use any paints/media, colours, embellishments, stencils/masks
  • Load up your project to Instagram any time during the week.  Please use Instagram links #jofybingo and @jofyjo in the text (not 'tagging' me please) so I can find it :o)
I'm going to use/combine 2 stamps sets each week but if you'd like to join in but only have one of the chosen sets then join in using that set! 


Share:
Blogger Template Created by pipdig