Mixed-media paper crafter; stamper, freelance craft tutor, designer of PaperArtsy JOFY stamps

30 November 2011

Paper Engineering, Part 2....

I recently started to follow Phiona Richards (@rarenotions) on Twitter (quick question - what did we do with our time before we tweeted? lol - don't bother answering...) who made/showed something that reminded me of an origami flower ball that an NCFE Student at SACC made a few years ago and it prompted me to make one (it was on a 'must try that when I get 5 minutes' list that was tucked away in the recesses of my brain), and here it is in all its origami-button-embellished loveliness.. really happy with how it looks - all 12 flowers, 60 petals of it!
Phew thats a lot of folding and sticking!


Loved making this - great project for making while you're sitting in front of the tv, folding & sticking, folding & sticking...
I really like the button centres....
This flower ball is made from 4in squares of paper, I'm currently working on one where petals are made from 2in squares - teeny tiny - I'll post a picture when its done. ;o)
On twitter, where I posted the pictures yesterday, people asked for instructions (waving at you Jean!)- the flower ball is not my design and I found the instructions on the web - there are lots of them out there - this is the one I used:
http://folio-love.com/diy-2/diy-paper-flower-tutorial/  This is the instructions for the flowers and then I guessed/played/looked at photos of how to stick all the flowers together to form a ball - which is quite easy to work out (or there may be another tutorial out there for that.
Share:

29 November 2011

Paper Engineering, Part 1: Me, Martha & some sheets of paper....

I love a bit of paper engineering - I find it relaxing (when it works!) - the methodical manner in which the pieces are cut and pieced together..
a couple of weeks ago I tweeted this:
I made it using the Martha Stewart 'party crafting template' a great tool which gives guides for cutting the individual pieces - no measuring - LOVE tools like that - its not that I'm a lazy crafter but if there's a tool that makes life/crafting easier then I'm interested!
This star was cut from one of my favourite papers - My Minds Eye - spots on one side and typed text on the reverse - LOVE! and I love how the star turned out - much nicer than the similar star that turned up on the front of 'Making' magazine the following week! lol (in my opinion anyway! lol)
The star measures 16inches top to bottom - I'm going to make some in a single colour to go on the christmas tree - I know 16inches sounds big for a tree decoration but the tree is 7ft tall, and it'll look great with these wooden snowlake decorations that we already have:
I think they're about 8-10inches - I really like big ornaments on a tree (as well as the little ones) statement pieces!
Share:

Where do I start!

Its been a while since I posted - again - and lots as happened and I'm not sure where to start soooo
lets start at the very beginning
its a very good place to start
when you read you begin with A.B. C..
When you craft you begin with.....
Paints from PaperArtsyyyyyy
Those clever-paint-making-wizards at PaperArtsy have expanded the range of Fresco Finish paints - I love these fantastic matt finish acrylic paints - if you haven't used them before get yourselves over to the PaperArtsy site - HERE - and buy some - you won't regret it!
 The new colours are brighter but still have the lovely matt finish and some are Translucent which means that you can layer them up with other colours, or paint over the top of a stamped image and that image will show through... genius - its made the range of colours really versatile.

Loving using stencils with stamping - something I used to do but have moved on to other techniques (like we all do) - so happy to be revisiting it - thanks to Lynne Perrella & Leandra for the reminder and inspiration.....
The above tags are samples I made when I demo'd the Fresco Finish paints (& PaperArtsy stamps) at Birds in the Barn (Marks Tey, nr Colchester).  I had a nice time demo'ing, talking to customers, and putting faces to names - waving at you lovelies Tina & Shirley! lol
I have a couple of days of classes planned at the shop in the New Year.  Hope to see you there.

So thats the update - I have a few others but I'll save those for another day...

xx
Share:

16 November 2011

Project of the Day :: Wrap it Up :: Banana Frog

Typepad is not in a happy mood and is not letting me load up my Banana Frog project of the day - so I'm blogging it here and linking across - so instead of the usual sneakpeek I show on here this month you get to see the whole thing! (I need to blog it somewhere and here's as good a place as any! lol)

My project of the day is made with three things in mind:
1) Attacking the stash
2) Recycling
3) Gift Wrapping - christmas is only 40 days away!!  :o)

Through the year I've bought several packs of Sizzix Embossing folders and they come in clear plastic pillow box - no printing or embossing on them - great for recycling! :o)
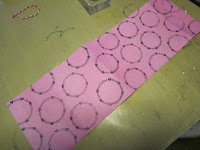
I got out a couple of my favourite Banana Frog sets - Backgrounds & Cake Greetings:

I cut deep strips of paper - about 9x30cm - and stamped along the length to create a decorative background.

Then I punched some decorative borders and attached them to the back of the above strips.
I stamped up a greeting strip and stuck that on top.
I'm still working my way through the pile of rosettes I made a while back so picked out ones that worked with the colourschemes and used them as a focal point for the wrap.
I stamped and punched motifs & attached them to the rosettes that I then attached to the wrap with glue dots.  I wrapped all of this around the plastic pillow boxes, added some bakers twine (love!) and stuffed with tissue paper.
I really enjoyed making these - reduce, reuse and recycle - and are such a cute way to wrap something.  All they need now is a gift inside.

For more details on Banana Frog products go here: http://www.bananafrog.co.uk/
Share:

2 November 2011

WOYWW....

Good morning all you lovely snoopers! lol

What's on my worktop this week - well not much really so you can actually see the worktop (fanfare please!):
BUT, the only reason the desk looks this clear is because I put all the cr*p, ahem, sorry the box of lovely bits of paper I'm saving for later(!) on the table in front over here:

see, now I'm just spoiling you - thats two desks you can snoop around if you feel so inclined!
& check out that box of lovely PaperArtsy Fresco Finish paints! and there's new colours bottled and waiting - how excited am I?!?!  I've seen them- and I want them.. no I neeeeed them....

OK, that's quite enough - off you go to snoop elsewhere... I'll be around for a snoop tour later

(ps.. I'm quite very embarrassed at how unorganised and messy my room looks - I'll be around for a snoop once I've cleared up (cleared out) my stuff (hhm so that could be next tuesday)... now where did I put the rubbish sacks...)
Share:

1 November 2011

Seasonal & Sirs

I'll be teaching two classes at the lovely Imagine That in Upminster on 16 November, there are still some places available so if you want some inspiration for mens cards or christmas cards then come along!
Here are the sneak peeks:

The classes include distress (products - not you or me! lol), die cutting, stamping... all in the surroundings of a shop full of lovely products!  What more could you ask for?!  Oh, you want tea & coffee? Yes, you get that too!!
Share:

Otto & Adelaide!!

I've finished my two projects from the Lynne Perella/ArtsyCrafts weekend...

First up is Adelaide (the Adventurer)
 
When I was making this piece I had to make up a back story for her to make sense of what I was putting in the piece so that (for me) it all made sense.... So, here is Adelaide, an Edwardian, educated, Lady who has a taken a pile of the Family money and gone travelling.  On her travels she has become interested in nature and has a particular fascination for birds.  To give here a slightly sassy look I cut off her hat and repositioned it over one eye - gives her an air of mystery or a polite 'I might be a gentle woman but don't mess with me' look lol
I couldn't decide whether to put Adelaide behind glass or not - I like it being open because of all the elements but then Bertie (cat) took an interest in the bird on her hat and the other feathers and the decision was made - she's safely behind glass! lol
I really love how this piece turned out - it's so gentle and calm but still with a lot going on (all the layers), and it was a great image that Lynne Perrella gave us to work with.

.. and now for Otto!!  I love Otto! - He gets his name from the book cover page that I used on the background of his assemblage.
 
So Otto's back story is that he was once a famous concert clarinetist - he played all over the world, was famous and adored by fans.... but now his star has faded and he makes his living tutoring people to play the clarinet... (I gave him this story because I felt he has such a proud but slightly sad face - but he should be proud - passing on his gift of music to others.....)
(he's not behind glass due to the twigs sticking out over the frame but he is up on a high shelf where hopefully my furry fourlegged friend can't reach him... fingers crossed lol)

So that how things work in my head - paper people are given stories so I can create an assemblage for them out of this'n'that... lots of fun! (but maybe I overthink these things rofl)
Share:
Blogger Template Created by pipdig