Mixed-media paper crafter; stamper, freelance craft tutor, designer of PaperArtsy JOFY stamps

11 February 2013

Thank you and congratulations....

...thank you to everyone who followed the Craft Stamper Blog Hop last week - I hope you all enjoyed it as much as I did, and were inspired to go and create something.

There was a spot prize on my my blog and.... drum roll please... the winner (randomly picked from the 145 comments, thank you for all the lovely comments by the way) is....

MaisieMoonshine!!

Please email me at the address given in the blurb under my photo on the left with you address so that we can send your prize.  Congratulations and enjoy your prize!!
Share:

1 February 2013

CRAFT STAMPER BLOG HOP


Hello if you're a regular visitor to my little corner of the WWW, or if you've stopped by as part of the Craft Stamper Blog Hop - however you landed up here you are very welcome! 
(If you didn't arrive here as part of the hop then it'd be worthwhile to pop over to the Craft Stamper Blog to join in, as there are lots of prizes to be won and inspiration to be seen!)
If you are new to my blog let me introduce myself - I'm Jo and I've been stamping for about 13 years, teaching crafts for about 9 and on the Craft Stamper Design Team for 3+ years (wow, time flies when you're having fun!)... I love what I do - if there is paint & ink under my fingernails at the end of the day then its been a day well spent.  I also have my own line of rubber stamps 'JOFY' with the brilliantly creative team over at PaperArtsy.
The Craft Stamper Team were asked to LOOK BACK at what had inspired us last year, what had been a favourite product, or favourite project...  Well that was an easy choice for me - last year I created a line of rubber stamps with PaperArtsy which I'm really proud of and this year there will be more designs added to the range - this time with a floral theme - starting with the set below.  Its very exciting.

When I created my stamps I wanted designs that were versatile - that could be used not just for the theme of plate they were on but in other themes too - so as a mini tutorial/inspiration I have taken a few of the stamps from my christmas plates and repurposed them.
--------------------------------------

I've said this many times - I love bunting!  So I have created a couple of pennants using motifs from christmas plates. The pennants are 15 x 21 cm in size and cut from white card.


I love the star on the above plate - the circles are great spaces for bling- gems, buttons, stickles - take your pick! lol

I coloured the pennant with distress ink, and stamped the small line image all over it using the same distress colour (peacock feather) and Champagne Encore Metallic (for a bit of shine).  I also water-distressed the surface.

I dragged the metallic ink around the edges too.  I dipped into my chipboard stash (one of my new years resolutions is to use up my stash of 'stuff') and pulled out letters which I then painted with the metallic ink.  I layered them up and stuck them on to the pennant.
I inked up a piece of white card with Champagne ink and stamped the star design onto it.  Mounted the star onto stripped corrugated card and stuck this on the pennant too:
This pennant was made entirely from christmas stamps but doesn't look christmassy at all - great for giving to someone when they've achieved something!.

Using the same set of plate I created a card with a very different theme to the pennant above:
I took the 'noel' banner & masked off the letters with masking tape which, when inked and stamped, gave a blank banner allowing space for any letters or designs/patterns.
I used PaperArtsy Ink & the Dog Words2 plate to spell out the word 'grow'.  I added some of my new flower designs to create a floral design.

One more pennant to show before you head off to finish the hop
This time I've used  plate05:
The long tiled image that runs across the bottom of the plate is great for creating a woven effect background (as does the block version). I used Walnut Stain distress ink to colour up the base of a pennant. Then used coffee Archival ink to stamp the image all over the pennant.
I used various distress ink to colour a selection of stamped flowers and leaves, arranged them with a couple die cut flourishes and adhered to the pennant. Embellished with a few buttons to finish.

Hopefully these little projects/samples might make you think about your 'christmas' stamps a little differently - just because they came in a christmas set doesn't mean they can only be used once a year!  :o)

--------------------------------------
SPOT PRIZE!!!
Well done for getting around the Blog Hop - I hope you've enjoyed it.  I have a spot prize for you - to be in with a chance of winning simply leave a comment on this blog post by midnight on Friday 8th February 2013. The winner will be drawn at random week commencing Mon 11th February. Gotta be in it to win it!!
My spot prize is a set of JOFY stamps worth £20.50 supplied by Paperartsy! Your next stop on the hop is the Craft Stamper Blog at craftstamper.blogspot.co.uk where you will complete the blog hop's circle!!

Hopefully you have been collecting letters along the hop - the letter to collect from me is: N
Thanks for visiting and I hope you enjoyed my post and blog - feel free to pop by anytime, you're always welcome!
Don't forget to pop over to Facebook as there is an event: http://www.facebook.com/events/384830431610801/

I hope to see you all again soon.

J
Share:

23 January 2013

fancy a 'cuppa'....

.... with me over on the Craft Barn blog
The theme this week is 'cups' and I chose to create an embellished fabric 'journal'...
I created a step-by-step blog post but here are some snapshots of the spreads (a fabric book with all its spreads fanned out is a tricky item to photograph! lol)

If you'd like a quick look at any of the items I used in the creation of this book the links are below:
Fabric Book
Spellbinders Nested cupsFabric packsFresco Finish paints ‘Mermaid’ with a touch of ‘South Pacific’Crafters Workshop  Stencils: Circle explosion or Circle grid
Share:

16 January 2013

Getting all romantic with IndigoBlu....

... over on the Craft Barn blog.
I created a card for my project this week, this text stamp is my favourite of all the IndigoBlu stamps - it would make a great Wedding, Anniversary or Valentine card...


If you'd like more information on any of the projects I've used please click on the links below:

Brown Card Blank 14.5x14.5cm (created from Bazill card)
Kraft card panel 12.5x12.5cm
IndigoBlu stamp 'Truly Madly Deeply'
Frantage Embossing Powders: Shabby White & Aged Silver
Share:

14 January 2013

Vintaj over at The Craft Barn

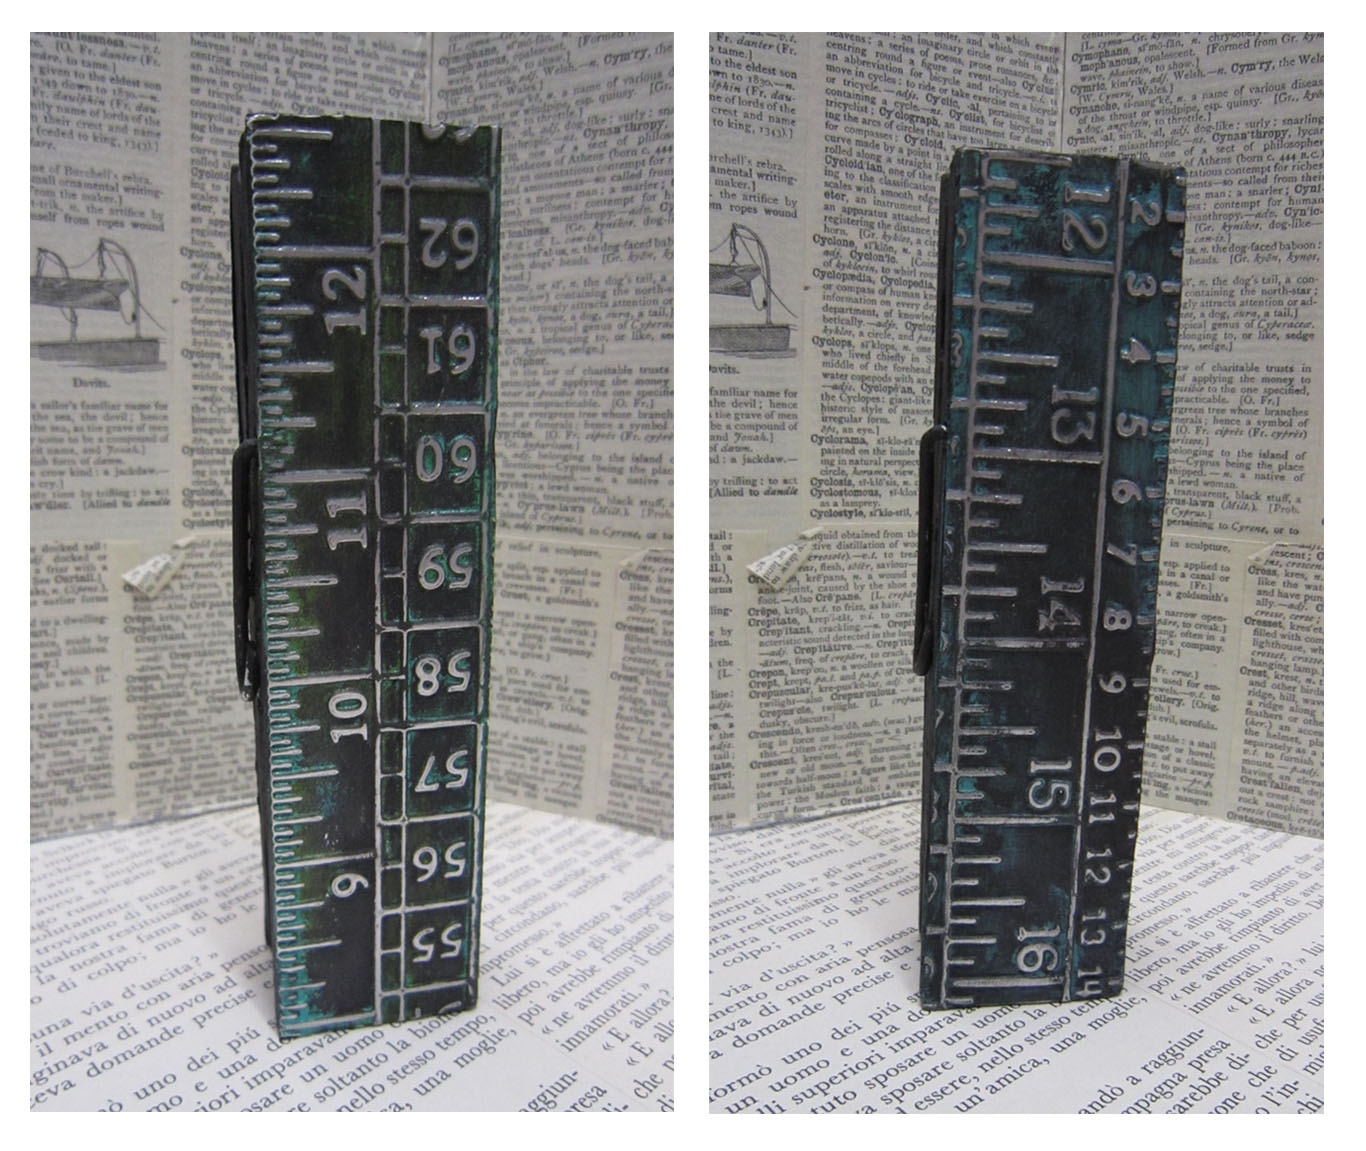
I'm all out of sinc!  Saturday was my day over on the Craft Barn blog (www.thecraftbarnblog.blogspot.co.uk).  I chose to alter a big-ish wooden peg:
Using the Patinas I painted it to look like verdigris - for more photos and for other projects from the design team head on over to the blog.

This week its all about IndigoBu.....
Share:

11 January 2013

Shake your tail feathers...

... with me over at The Craft Barn on Sunday 20th February for a class where we'll make these little feathered lovelies into a decorative piece:
If you'd like to come along there are still some places available - phone the shop for details or to book a place (01342 836398).
Look forward to seeing you.
Share:

4 January 2013

Arriving in 2013 with a 'spring' in my step....

Late last year (sounds funny saying that doesn't it!) I started designing my new stamp sets.. they have a lovely spring feel to them... so excited for you to see them all but at the moment I can only show you the advance set:
(such a tease!)


and couple of some sneek peeks of projects:
The set is available now over on the PaperArtsy site - click the 'JOFY' button over on the right of the screen to be taken straight there.
Over on the PaperArtsy blog Leandra has information about an article Creative Stamping magazine, available in shops now, featuring the stamps:

More samples to follow soon....
Share:

3 January 2013

Christmas is coming ...

..oh no, oops.... christmas has been and gone hasn't it!  I hope you all had a lovely time and that you were rewarded by Father Christmas for your good behaviour all year.  :o)
Christmas was special for us this year because it's the first time we have hosted christmas!!  I left home 17 years ago, been married for 7 years and so its a long time coming! And it was definitely our turn ... when we bought our house in July last year several family members said 'congratulations, all round to you for christmas then!' lol

So, in brief - here are the xmas photos I mentioned a few posts back and things I learned this christmas:

It was fantastic to have everyone in our home (cats may feel a little differently, but DH and I enjoyed it!) - but we forgot to take photos!

Everyone was asked to wear christmas sweaters (again we forgot to take a group shot.. shame we missed Ethans flashing nose lol).. but I did take these on the days before:
This is my sweater - candy canes made into a heart (such a romantic! lol) subtle apart from the back which is bold black and white stripes...:
Hubby's sweater makes me smile:  not bad for £12!! They had 2 red sweaters and about 50 blue ones...Matt bought the last but one red sweater and when we went back 90mins later to buy a blue one for my Dad they had all been sold! in an hour and a half!!

So my Dad made his own.....
..... based on one of my stamp designs - I love that he did that! So brilliant! He got the [imaginary] prize for best sweater!  :o)

I learned that if you are going play Pictionary make sure you have a small child on your team! They draw simple pictures that are instantly recognisable.... oh and make sure the person drawing knows what the word is - we had a misunderstanding with coral and corral that led to all kinds of confusion! lol so nice to sit around and play games - Jenga is always a winner!

My hubby did a great job feeding everybody - v proud of him!  I decorated our triangular conservatory for dinner - a bit of a challenge seating wise! lol 
.. and the prize for best packing goes to Gift Cards from B&Q - Genius packaging!

So there is there is the brief round up of my christmas... it also involved lots of card making, party games, fun times, a well earned brief rest oh and something that I haven't done for years... no.. decades!!
I sat on Father Christmas' lap!

I'll be back v soon with some exciting news about some JOFY stamps!


Share:

2 January 2013

Happy New Year!!

Phew, time just flies by between Christmas & New Year doesn't it!! (a very strange time I always think - a friend of ours called in Crimbo Limbo - I thought that was great and very appropriate! lol)
Just a quick post (before the post with pics of my christmas) to tell you that I'm really excited and pleased to be a Guest Designer over on The Craft Barn blog (here) for the month of January.  Each week in January (as always on the blog) there will be a new theme and new projects from myself and other members of the Design Team. 
 
Full details of my project can be found over on the Craft Barn blog (click the link above), & below are the  links to the materials used in the project and links direct to them on the site:

Materials:
Chipboard

Claudine Hellmuth sticky back canvas sticky back canvas (to cover the chipboard)
Inks:  Archival Black Distress Inks Gathered Twigs
Dies: Sizzix/Tim Holtz 'sewing room', Sizzix Sizzlits 'sewing & writing set'
Stamps: PaperArtsy HotPicks: 1211, 1213, 1214, 1216
Fabric
Buttons

 
Back soon, and again- Happy New Year!
Share:

16 December 2012

More cards....

This card is a variation on the snowflake/present pile tags I created a few posts back- & I'm showing it to you so I can answer a question I've been asked.... which was about the ink I use for the snowflakes.  I use clear embossing ink and clear embossing powder over a white card - I find the clear embossing powder holds the detail of the image better (because it is finer).. (I'll have some other handy tips for you in the next couple of days...)
Here is a card using Mini-8 - the candle - this image is one of my favourites and I think it works so well with the 3 small candles on plate03..
I like how the 'ghost' images (tone-on-tone) fill in space on the background but aren't distracting... gives the card a lovely vintage feel...(makes me think of Dickens novels...)
I might put the Christmas crafting to rest now - except for when its used on wrapping of presents- I'd plan to pretty up gift cards/vouchers and there has been some great inspiration out on the web... I'll keep you posted...
Share:

14 December 2012

Still making Christmas Cards?...

... oh, that'll be just me then!

The cards shown today are some of those I made for a class planned for The Craft Barn that sadly didn't run... the idea was quick-ish last minute cards:

First up is my lovely little snowman:
I drew a line 1/3 way up the card and stamped the snowman (archival black). Around him and under the line I stamped and embossed snowflakes (Mini07, clear ink, white powder) onto the base card.  I added a die cut strip (Sizzix/Tim Holtz On The Edge Snowflakes) along the drawn line to give Snowman a base.. a bit of bling in the form of sparkly gel pens and gem stones and its done.

Next is a really simple quick'n'easy card- lovely festive colours & a bright clean look (photographing items is tricky in the winter- the light is so cold/blue)
The crisp white and cherry red is lovely (and not coming across in the photos..)
The wooden snowflake on the left was covered in 2 layers of embossing powder and while it was still hot sprinkled in the Ranger's loose Stickles glitter (love!) then heated so that the embossing powder encapsulates the glitter - so lovely and sparkly.  The stamp used is JOFY Mini06.

Lastly today is one of my favourite cards, and a 'go to' technique for making quick batches of cards:
I like to create a big piece of motif card - a 'masterboard' - and then cut it up into smaller panels to use on cards.  On this card I kept the masterboard really simple: I stamped lots of Snowflakes (mini07) in clear ink and embossed with clear powder - this protects the crisp whiteness of the base card.  I coloured it using Iced Spruce Distress Ink (a big favourite of mine this christmas) - I could have added more texture to the background by water splashing it but chose not to so that the snowflakes remained the main feature.
I attached the panel to a DL card and framed it by stamping the line/star motif from JOFY08, I stamped the large star (plate08) on to kraft card, cut it out and attached it with 3d foam to the card. A wooded star - another favourite this year- buttons and gems to embellish and then it was done.
Masterboards are soo useful because pieces can be used on different sized cards and the cards will all look different but the same too- creating a 'batch' or 'set'- great for the lead up to christmas when time starts to get a bit tight....

All the items used on the cards can be bought at the Craft Barn:  www.thecraftbarn.co.uk  - JOFY stamps, Embossing powders, distress inks, card blanks, wooden snowflakes and dies.

Onwards and upwards with the christmas crafting....

ho ho ho
Share:

12 December 2012

Deck the halls....

... it was time to decorate our home - festive tunes on the stereo and a glass (or 2) of bubbly stuff and the decorating was go, go, go

This year the tree is the right way up (!)
I love decorating the tree- getting the decorations out each year and choosing what colour scheme to go with- this year I chose a really simple scheme- White...
I've wanted to make a garland of pompoms for a few years but the thought of making enough pompoms to go around the tree (ours is 7ft high) was daunting but then I found out a shop was selling bags of white pompoms as 'snowballs'... LIGHTBULB moment! So I bought 3 bags & strung approximately 100 (yes, I counted them lol) onto a length of cotton yarn... LOVE how it looks - the tree is so pretty (even if I say so myself!)... And I managed to decorate the tree this year without injuring myself at all! (if you want to know what happened last year and what an upside down christmas tree looks like go here)

I've also created a wreath for the front door - something I haven't done for a while:
I'm really happy with this- love the combination of the colours - & I can't tell you how excited/pleased I was to find those black sparkly snowflakes when I was looking for something in our boxes of decorations...
The wreath is a combination of lots of my favourite things - kraft card, glitter (black glitter - v glam!), buttons, calico, my stamps - love it - would it be wrong to hang it all year?? (inside, not outside!)
Happy to use my stamps on the wreath too - a lovely fun contrast to the darkness of the snowflakes, and the Kraft tones down the blinginess of the baubles. The pieces are all attached by hot glue... gotta love a hot glue gun!

Sometimes I buy decorations to alter them (which I'm sure some of you do too) - buying them in the sales or when they're on offer like these:
..and I alter them- not because I didn't like them but because they suit an idea that's in my head or I can see how they can be altered:
This is the back and front of the same decoration.... Fresco Finish (great coverage!), buttons, die-cuts, and vintage book text.. :o)


I hope your festive plans are coming along nicely..
I've noticed (from being on both sides of the counter) that the shopping 'frenzy' has begun - good luck out there!
Take care..
Share:
Blogger Template Created by pipdig