Mixed-media paper crafter; stamper, freelance craft tutor, designer of PaperArtsy JOFY stamps

9 May 2019

Australia Teaching Tour 2019.....

... or as I'm affectionately calling it - 'Operation Oz'!

The plans are laid... the workshops are ready and I am sooooo excited to be going to Australia (AAAAUUSSTRAAAALIAAA!!!!!!!) in July to visit four lovely shops!!!!!


(aaaaaand breathe!!!)

This is going to be an amazing trip & I'm absolutely thrilled to have this opportunity to visit Australia - can't wait to visit these lovely places and spend creative days with people...

4 weeks.

4 shops.

12 workshops.

I might even get to hug a Koala (gently - apparently they're  not quite as cuddly as they look!) or stroke a Kangaroo (again, gently!).

If you're in the area of any of the above shops please come along - details (links to their websites) are over on my 'Teaching Dates' page (link at top of page)

Thanks for stopping by


Share:

26 April 2019

What no stamping?!?!!

... Nope.  No stamping at all.. not even a teeny tiny detail stamp!


I bought a large Dylusions journal recently and this is the first spread I've created in it - its liberating!! All that space to create on!

I've had a rotten cold all week (actually lost my voice for a few days!) so these pages were almost a kind of 'therapy' - made me feel better to do 'something'... so its not overly complicated...

I painted and stencilled 2 pages (Fresco Finish paints, Stencil Girl stencil, Crafters Workshop stencils).  Not planning, just playing - I sketched flowers onto scrapbook papers (siiiiigh... oh, Basic Grey.. how I miss your gorgeous papers..) and cut them out.

The journal is BIG.... here's my hand on the spread to give you an idea how big...
... well its big for me - I usually use the small or square journals... and my junk journals are only 4x6 (ish) inches.

I glued down all the flowers and then set about sketching and shading in the details.  I took before and after photos to show the difference - amazing what a bit of doodling can do:
I think adding the details is my favourite part of the page creation... though it is hard to know when to stop!

Here's the finished spread... it makes me happy - all those big bright juicy flowers!


See (or not see actually, lol!)  No stamping!!  (It was hard not to reach for the stamps.. but fun too!)

This was a lovely, fun way to attack 'The Stash' of papers.

Thanks for stopping by


Share:

16 April 2019

Ombre blooms....


When I'm designing workshops options/ideas get discarded along the way (because they're not quite suitable for the event etc etc etc)... and this canvas was one of them... I'd painted the backgound (I love an ombre background!) and the flower stem (grunge paste through stencil PS131) and it sat propped against the side of my desk for a while... and then I caught it with my foot one too many times and I picked it up again to work on it....

This is a 50x20cm canvas... which is quite large (!!)... (for me anyway!)

I stamped scribble flowers randomly along the bottom area of the canvas using Pearl Glaze - I like how it catches the light but doesn't crowd the area.

The top edges are filled with dangling leaves and tendrils.  The gold spots are created by running glue dots around the edges and laying foil over the top...

Here are the stamp sets I used:


I think the canvas might need some butterflies or something but for now I've reached the 'put the paint brush down, move away from the canvas' stage of the project.

I'm saying its done... finished.

Thanks for stopping by

Share:

8 April 2019

Colour puddle card....

... I reeeally like painting 'colour puddles' and usually use them as the base to stamp flowers. I'm always thinking and looking for other ways to use them... when I saw a post on Instagram (linking to the Sizzix blog) where they had used these (very lovely) flower dies as a stencil on cards I had a lightbulb moment... and this card is the result...


I posted this photo on Instagram and said I would put simple instructions here on my blog - 'simple' because it is reeaally simple..


Step 1.  Paint a colour puddle... this is done by painting a circle of paint (going round and round and round until the paint on your brush runs out..) then adding another circle/ring of paint in a second colour and painting round and round and round and round until your paint runs out again - blending the colours as you go...  its very relaxing! 
NB. The photo below shows the colour puddle cut to size to fit the card.

Step 2. Die cut the chosen flower in the bottom right hand corner of the card blank (mine is 12.5x12.5cm)


Step 3. Attach 3d foam pads around the edges of the colour puddle panel.


Step 4.  Attach the colour puddle panel to the inside of the card.

I really liked the clean and simple look of this card... but realised it was a bit too clean and simple! I mean there is such a thing as too much white space surely! lol

Step 5. Cut the white card blank in half and cut the front panel down to fit a 12.5x12.5cm kraft card blank - this will warm the card up and give a frame all around.


Add a strip of coordinating washi tape, a small tag and tiny die cut heart. Still clean and simple but not quite so much.

I wasn't kidding was I when I said it was a simple card - simple but lovely (in my humble opinion! lol)


Thanks for popping by!


Share:

21 March 2019

Fly my pretties, fly!

This spread in my small Dylusions journal makes me smile - its so... erm... busy!! Painting, stencilling, stamping, more painting....

I seem to be going through a 'add more colour, and make them bright!' stage at the moment... do you think its because I want it to be summer when all the flowers and colour starts appearing everywhere?
I've used Kay Carley's 'butterfly' on this spread - I loved it as soon as I saw it! It might make regular appearances - I think its going to look lovely with my flowers!


 Thanks for stopping by!


Share:

Mini mash-ups!

In January and February I went to the 3 craft industry trade shows - had a fun, tiring and inspiring time at all of them.... I demo'd at all 3 - some of my samples are over on the PaperArtsy blog as part of my post about the new stamps (HERE) and here are a couple more.  When I'm demo'ing I like to mix up the PaperArtsy ranges to see how they'll look together, and mix old and new of the JOFY stamps too... always fun to do...

Green and teal/turquoise blue is always a lovely combination...

The PaperArtsy mini stamp I used on here is one that Leandra had chosen for the stamps on the demo desk - I'd forgotten what a lovely little stamp it is.  I'm very tempted to buy another one so I can cut it up and have an alphabet set to use on journaling - the 'open' design means the letters could be coloured in... very useful!


This next sample has lots of white space (I do love a bit (a lot) of white space!) and is a mash-up of mine and Tracy Scott's newly released ETC24...


Thanks for stopping by...


Share:

17 March 2019

New Stamps!!

Yes indeedy... more new stamps!!!


Sketchy abstract flowers inspired by doodles & paintings made on holiday...


PaperArtsy Stencil 135 (PS135)

PaperArtsy Stencil 136 (PS136)

PaperArtsy Stencil 137 (PS137)


Its been soooo hard to keep these to myself - though you may have spotted some of the sketched stems in recent posts and projects (!) - I've really enjoyed using them and I hope you do too!

Thanks for stopping by - make sure you visit the PaperArtsy blog for the full release and more samples! go HERE


Share:

13 March 2019

A little bit of this'n'that....

... went in to creating this 5x7in canvas board.
I was just playing around and so didn't take any process photos, but after being asked about it on Facebook and Instagram I wanted to list the products I used.
PaperArtsy stencil: 
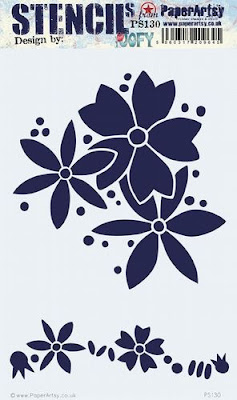
PS130


PaperArtsy stamps: 
JOFY73

(and a secret something...)


Dies:
Elizabeth Designs:


Kaiser Craft:
Foliage (DD506) :  sadly now discontinued :o(  
Decorative Dies Foliage

Paint colours, Fresco Finish (of course, lol) were.. I think...
Lavender, Cerise, Vanilla, Koala, maybe Bougainvillea, and possibly some Seaglass (gotta love a Seaglass! lol), and a touch of Green Patina/Sargasso

These might not be the exact colours but when you blend them they are going to look FAB.U.LOUS!

Play with the colours - you'll find things you didn't expect and have fun!

Search for these items at your local shops, and online.

Thanks for stopping by!


Share:
Blogger Template Created by pipdig