Mixed-media paper crafter; stamper, freelance craft tutor, designer of PaperArtsy JOFY stamps

29 April 2013

A Crafty Day at Colemans....

... is what I had on Saturday... Its called Colemans Warehouse but I'm not sure that does it justice! Soooo many great craft items under one roof ....

It was a really enjoyable day.... & a busy, creative day (judging by the amount of paint and ink that was on my hands!)  Thank you to all the lovely people who came and watched my demos - with JOFY Stamps- thanks for the lovely comments, & the PaperArtsy Grunge Paste (whats not to love about that product!) and the general 'oooh'ing and 'aaaaah'ing at the reliability of the Crackle Glaze!  it works I tell you... every time!

Speaking of Crackle Glaze & JOFY stamps:
The crackle on this wooden block (liked these blocks a lot) has been painted on in areas rather than all over to demonstrate that its possible to do that - you don't have to crackle an entire surface...
The flowers are painted with Fresco Finish, stamps are from JOFY12

This smaller wooden block is a perfect size to use with a Mini stamp - Mini10
Towards the end of  demo days I seem to create what I'm going to start calling 'scoop up' creations - items that I make from all the bits that are left on the desk:
Gotta love a tag!  especially a corrugated cardboard tag, with flowers and a button - the second button of the day!  I only used two buttons all day - very restrained for me! lol


Look at the size of my demo desk!!! I laughed when I saw it - now that's what I call a demo desk! lol - lots of space to spread out and get messy on.. ahem not messy - no, creative on...
Its lucky the desk was this big as I took lots of samples with me and I'm always happy to do that- items that have previously been posted here on the blog.  But, I hope that the people who watch demos, look at and photograph the samples understand that as a demonstrator I make and show samples not to have them copied but to provide inspiration that hopefully acts as a springboard for their imagination, so that they can go home and create their own projects.
* * * * *


I'll be returning to Colemans on the 30 August for the demo day, and on the following day (01 September)(duh, sorry to state the obvious! lol) I'll be running 2 card making classes - JOFY Florals in the morning and Christmas Cards, yes Christmas Cards(!) in the afternoon.


aaaanyhoo - back to the studio - things don't design themselves do they! ...

Enjoy your day
Share:

27 April 2013

What is it about daisies???...

... I love daisies which is a good thing because at the moment they seem to be the only flowers in our garden (apart from 5 daffodils (now past their best) and 2 camellia bushes)...
Daisies are such happy little flowers - dainty determined little plants - pushing up through the paving slabs on the patio to create little forests of bright white flowers heads with lovely flashes of pink.
The sun is now out (here in the UK) hopefully it'll stick around for a while.. I sat out in the garden yesterday and today to have my lunch - its so lovely to be able to do that - when the sun is shining it feels as if anything is possible...
Share:

26 April 2013

tick tock tick tock tick tock....

.... goes the clock in the box as the flowers bloom and grow...
I had such fun creating this piece - made from bits and pieces that were hanging around the studio - they've been 'up-cycled'.. like the box: its the lid of a small Tim Holtz Configurations box, painted in Nougat Fresco Finish (I love love love that colour), the back is covered in text scrapbook paper that I stamped seed heads onto but I forgot to photograph it before I assembled everything - doh! but you can see a little bit here:
I wanted the piece to have a sepia, almost monochrome look - so very limited colour..
I painted the flower heads (JOFY11) with Distress Ink to achieve a watercoloured effect (Walnut Stain)... stamping on the back layer of the box and then adding all the dimensional elements really helps to build up a sense of perspective and depth.
I love this clock die by Tim Holtz /Sizzix - I used to own an alarm clock like this very pretty but it is a hellish way to be woken up - seriously unpleasant - a little hammer on metals bells!! Not a soothing entrance to the day ahead...
This clock is much nicer! (its quiet for a start!).. I created it by cutting clocks from corrugated card (from cat food boxes that I've been saving - it has really fine corrugation) and one from plain card (for the front layer that would be painted). 
   
The flower heads I used are from JOFY12 - stamped on white and painted with Distress Ink (Walnut Stain), I also stamped onto a distressed scrapbook paper that I had, cut out the flower centres and heads and added them here and there... not really planned just what look good.
The piece has more of an Autumnal feel than any of the other projects I've made with the stamps and so I added a legend in top right hand corner (Mini15)(I find those little seasons words really useful).
Behind the clock I added a couple of die cut seed heads (quickutz) - die cut from kraft cardstock to keep with the natural sepia tones of the piece.
And I couldn't resist adding some wooden flowers... and some bling.. oooh not forgetting the bling on the clock face!
I stamped phrases from the JOFY stamp sets on to the sides of the box... and the mesh strip along each of the corners (just visible in the bottom left of this photo..)

I love this piece - it was fairly time consuming but not as much as you might think - the construction of the clock took the longest time, & there is minimal stamping...  I could happily make another one...

Must love'n'leave you - I'm off back into the studio to get ready for my visit to Colemans Warehouse on Saturday where I'll be demo'ing my stamps.  Looking forward to that - hope to see some of you there.
Share:

25 April 2013

Mostly I am here....

.... but today I can be found over on the ever-so-inspirational PaperArtsy blog... head on over and take a look at the project I made.....

Share:

21 April 2013

Samples... but not mine!...

... these are by the very talented Kay Carley.  These are the cards she made at a recent demo day at The Craft Barn:
Kay coloured the images using Copic Markers, and added sparkle by using 'flitter flakes'.. I really love the cards - using the Copics has made the images look so dainty!
I was really thrilled at what Kay had done - beautiful! She has more samples on her blog , go take a look.
Kay will be demo'ing with the stamps as the Craft Barn Extravaganza in June (01-02 June).. as will I, Leandra Franich, Lin Brown, & Helen Chilton.
Please come along - we'd all love to see you!
Share:

20 April 2013

samples, samples, & more samples Part 4

...coming to the last of the tag samples.. more flowers which is good - if the weather report is to be believed we're in for some nice sunny days this weekend (fingers crossed! lol) (I'll still be packing my brolly though)
Left tag:
This is colour using mainly Distress ink, the flowers are stamped and cut from misc' papers (scrapbooking, book text etc)... the panel running up the left side of the tag is stamped with Mini12 - lovely to use as a backbround stamp or use the individual flowers:
The words are taken from JOFY11 - stamp them and cut them out - easy way to add a phrase - these have been 3d mounted to create dimension/layers on the card (as have some of the flowers...):
Centre Tag:
The colours on this tag are sooo juicy! the peachy pinks (created with the help of Blood Orange Fresco Finish paint) (love)... its also a version of one of my favourite colour schemes - pink&green... also a slightly different treatment used on the ball stems... are they pussywillows or are they seed heads??? I don't know - use them as you want.. that's how I designed the stamps - so you could interpret them however you want...   On the this tag I've coloured them to look like berries...
The 'summer' tag is created with MINI15... here it has been used as a stamped on to kraft card, cut out and attached to the tag..
Right tag:
This tag is in a completely different style (I think) - very simple - the images are stamped onto paper (Prima) featuring ledger paper.  The leaves have been coloured/painted with Distress Stains to create a watercolour effect.  The flower was created with leave images stamped onto a dull red paper - I painted over that with London Bus - this worked really well because it brightened up the red and because it's a translucent colour none of the stamped detail was lost.

Enjoy the weekend - fingers crossed for a sunny one! lol
Share:

19 April 2013

Samples, Samples, & more samples Part 3

... made in advance for AllyPally and for the up-coming demo days that I have - the next one is at Colemans Craft Warehouse (Northampton) on 27th April (next weekend) - looking forward to that very much...

...here's the samples:
Left to Right...
Left: Taking the time...
Fresco Finish base (Baltic Blue, Tinned Peas, bit of Guacamole & Nougat), dried, stencil of clocks (Crafters Workshop) with Grunge Paste (love love love), dried, swipe of Treasure Gold, and then I sanded the whole top area over the clocks to smooth it out, knock back the gold and weather/distress the tag.
I stamped the 'dandelion' heads (JOFY12) in black and touched the flower tips spots with a gold gel pen, and stamped the phrase along the long edge.  I like the crisp black stamping against the distressed background:
Centre Tag:
I love the pink flower heads against the blue background - so cool  & fresh.  The long white flower stems are stenciled again with Grunge Paste (I told you I love it!) (Crafters Workshop stencil) but this time they haven't been sanded back...lovely and crisp with a nice matte finish.
Right hand Tag:
This is work in progress - created while I was demonstrating at the show... Corrugated card tag (stripped at the edges), painted in Nougat Fresco Finish, stenciled the background with coloured spots (Blue Blue & Guacamole) and overstamped the stenciled spots with mesh (go here to find out more), stamped dandelion heads and tipped with London Bus (lovely accent colour - zingy!)... Stamped 2 flower heads/stems and leaf - painted the leaf but covered one of the flower heads in a flower created with  leaf images.

Pretty spring/summer tags which, unfortunately, is a near to those two seasons as we seem to be getting here in the UK at the moment!  While I was out and about yesterday (I live in south-east England) - in the space of 60-90 minutes our weird and wonderful weather had delivered high winds, brilliant sunshine, a hail storm (and I mean storm with pea sized hail!!), thunder and lightening, torrential rain and then back to glorious sunshine!! Gotta love it!

Thanks for popping by...

I'm off back to the studio.....
Share:

17 April 2013

Samples, samples and more samples Part2....

.... the first batch of tag samples - I do love a tag (or 2)...(you may have noticed!) these are, for me, functional rather than inspirations samples - tags where I have created little 'testers' or simple 'techniques'...
Spots are another favourite of mine - love a bit of spotted paper, or fabric, or ribbon! On these tags I used a stencil to create the spots.  I had planned to add flower images or embellishments to the tags - but I've decided to leave them like this - for reference...
Left tag:I used Mini15 to stamp words (2nd generation, black archival ink) over the background of the tag leaving some area unstamped. The spots are stamped in Fresco Finish Pansy and a mix of Guacamole and Tinned Peas.  The mesh stamped image is from the long mesh panel on JOFY10
Centre tag:
The corrugated card tag had the edges and bottom edge randomly stripped of the outer layer, the surface was then painted with Nougat (love!) paint - great base colour.  The flowers- Mini14- were stamped using Archival Green, then the spots were painted in Pansy with a spot of Pearl Glaze added over the top... just making little spots of colour pearlised adds that little bit of subtle 'bling'.
Right tag:
Base of tab was randomly painted with Pansy, Guacamole, Nougat and Tinned Peas (probably a bit of Hey Pesto in there too!)(that list sounds like a weird salad recipe doesn't it! lol).. tag was stenciled in a similar way to the tag on left but the square/rectangular spaces were filled with text.

I enjoyed making these tags - creating one inspired another (love it when that happens) - i could've created more (I think) but I had to move on to other things... another time maybe
Share:

16 April 2013

Samples, samples and more samples....

..... made in the lead up to AllyPally this weekend.. I had a lovely time demo'ing on the PaperArtsy stand - where Leandra was demo'ing next to me (giving me a little bit of stick - I wasn't quite the 'tidy' demonstrator she expected lol).  It was a chance to meet lots of lovely crafters, put faces to twitter names, answer lots of questions - it was a really great day... I didn't get a chance to look round the show (apart from a quick dash to the MDF man - very lovely things) so I might go for both days of the September show - shop the first day and then work the second - that's if PA/Leandra will have me back (I'll work on my tidiness! lol)
There has been a really positive response to the JOFY stamps so thank you to everyone who has bought them and I hope you are all enjoying creating with them.

I took a grand total of 3 photos on the day (shocking for the person who normally takes photos of everything.. twice..., but it was too busy to take photos) and two of those photos were of the beautiful stained glass window in the large hall.  AllyPally is undergoing a huge refurbishment to bring it back to its former glory... its a wonderful landmark in London and has THE most amazing panoramic views of the city.

I'll show you my samples over the next few days - the first sample is a double icon - the most detailed sample I made (and possibly my favourite.. but don't tell the other samples - it might make their colours fade in disappointment lol):
The icon was painted with Fresco Finish paints (using one of my new favourite paints - Tinned Peas)(more gorgeous new colours have recently been added to the range... Blood Orange is another must-have). I stamped directly on the icon itself and also onto papers that were painted, cut out and then glued onto the icon. This helps to create a subtle depth...
The surface of the icon needed to remain flat so it could be closed- normally I would 3d mount some of the flowers or attach a button (or two!) but on this piece I had to resist.
All the shading is created with Fresco Finish paints - using mainly the translucent colours.
Pink & green is one of my favourite colour combinations... I could happily use it over and over again.

EDIT:
I forgot to show the sides of the blocks :o) - painted with Tinned Peas (of course!) and stamped with the long hessian strip from JOFY10 (Archival Coffee)

That's today's sample - I'll be back tomorrow with some more...
Share:

10 April 2013

Taking the time...

... to play helps to learn/discover new things- and any mistakes along the way help to learn even more (that's what I think anyway- and that you learn something new every day- whether its big or small)

This little panel is something I made from bits I found on the desk when I was clearing up (there is always something (or rather lots of things) left on the desk...
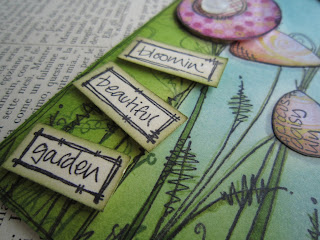
I've been trying to only use one stamp set each time I create a sample (these stamps are from JOFY11, and, oops, the words are from JOFY09) (it's a hard plan to stick to- I want to use all the stamps! lol)
I liked making little signs out of the phrase- another way to add the phrase to a piece.
The base is die cut from the mover&shaper cabinet die (again - I told you yesterday that I like it! lol)  painted with Fresco Finish Crackle Glaze, Paints, stenciling (Crafters Workshop), and JOFY stamps (well it'd be rude not to! lol)  The piece is quite small (I like to make dinky little things) the card is 10x7.5cm - the signs give it extra height.
BTW other projects using the stamps go take a look the PA blog - Leandra and the Guest Contributors have been creating some great projects... go here

I'm off to make demo samples ready for Sunday at The Big Stamp and Scrapbooking Show at AllyPally - I'll be on the PaperArtsy stand - hope to see you there...
Share:

9 April 2013

Could it be any more shabby chic...

.... possibly not...  I'm talking about this tag that I made to get an idea out of my head before I started something with a deadline..don't get me wrong - I don't mind a bit shabby chic, not at all
Love this birdcage stencil and have wanted to use it with my stamps for ages - I wasn't going to use it like this but I was also impatient to use the new (rather fab) PaperArtsy Grunge paste:... oh and some treasure gold.....
... and look - I stamped in a colour other than black!  drum roll please!  I like the 'no black stamping' - its definitely softened the look of the piece...

OK, back to creating 'stuff'....

Oh, and by the way Mad Men is back on our screens (here in the UK) tomorrow!! Soooooo looking forward to it - can.not.wait!!
Share:

The Goldilocks approach to creating....

... Over the last few weeks I've been working on projects for upcoming classes ..... I sat back and looked at what I'd created I realised that some 'were too small' and others 'were too big' and some were 'just right'.... the Goldilocks effect....

I like this Sizzix/Tim Holtz 'Cabinet Card' die, and the matching 'movers/shapers' that goes with it.... its so versatile.
This time I used it to cut the main shape, and cut again with the mover&shaper die in place to create a frame.  I like to have some of the stamped images coming over the edges structure (gives it movement):
& then use the smaller piece that remains once the frame is cut to create a 'stand' on the reverse...
This was a bit of a light bulb moment for me - some of you might have been doing this for ages but as it was new to me I thought I'd share it just in case you haven't.  lol
The flowers are painted with Fresco Finish - loving the new 'Blood Orange' colour.. Juicy!!
(it was very tempting to stickle the top of those 'dandelion' heads.... I resisted, but I'm not sure for how long...)

OK, I'm off to create more class samples - I've created a blog page with my teaching demo'ing dates (button under the main banner) so if you fancy a day of inky, painty, stamping come and join me.... the more the merrier  :o)
Share:

8 April 2013

Trip the Light Fantastic...

... by definition  'is to dance nimbly or lightly, or to move in a pattern to musical accompaniment'.. which is exactly what Ginger Rogers would do (as she always did) in these dancing shoes

The writing around the sole is one of my favourite quotes: 'Ginger Rogers did everything Fred Astaire did, except she did it backwards and in high heels'... seemed appropriate.
The shoe is going to the Craft Barn to be used in their new location, shoes have been handed out to be decorated - can't wait to see what everyone else has done.

The shoe is painted with Fresco Finish paints - sole is Elephant - one of the new colours - a lovely grey, flower is made with a leaf stamp from the JOFY range, buttons from my never-decreasing stash (there had to be a button or two didn't there!), and the flourishes are a Spellbinder die (floral flourishes - one of my favourites)

Share:

3 April 2013

Oh yeah, wait a minute Mr Postman....

 ...a week or so ago I was playing around making simple cards with JOFY Mini stamps, and while tidying up the desk (yes the desk in dire need of tidying again) I found the left overs (the otherwise know as 'things that might come in useful later) & I realised that I haven't blogged the cards so here they are for your delight and delectation!
I like seeing them together because they each have a slightly different look/style to them...

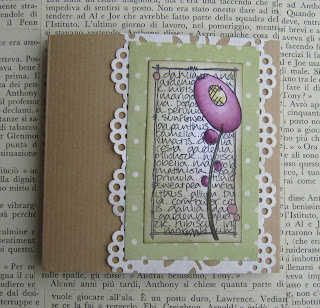
A little bit of shabby chic (and a little bit pretty!):  paper lace ribbon (stash attack!), dainty spotted paper and a lovely 'seedless preserve' Distress Ink painting on flower, all on lovely Kraft card:

A little bit distressed, colour dragged around the edges, pale/washed out stamping on the surface and distress around the motif panel:

This one is a bit more modern - bright white card, 'Peacock feathers' Distress Ink stamping and painting:

All these cards are really quick and easy- just what you need sometimes and as none have any greeting can be sent for any reason - great to keep in a box - just in case.

Its getting a bit nippy again here in the UK - wrap up warm

I love seeing all your comments - thanks for visiting :o)

Take care
Share:
Blogger Template Created by pipdig