Mixed-media paper crafter; stamper, freelance craft tutor, designer of PaperArtsy JOFY stamps

20 June 2014

That was then... this is now.. part 2..


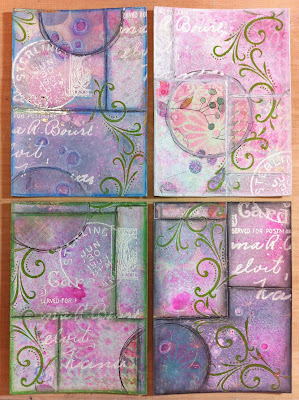
Back in April I showed you these panels:
... and blogged how I altered one of them with the use of my stamps:
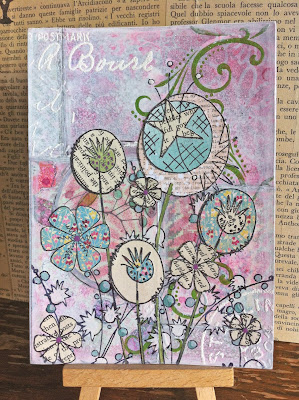
... I've recently altered another one- prompted by a sketch/plan I made in my sketchbook earlier this year...


...and here's how I used simple painting, stamping and stenciling to make the changes.

Firstly I sealed the surface using Matte Medium because when I altered the last panel I found the sprayed colours ran and were absorbed into newly applied layers (annoying!)- Matte Medium is great for sealing a surface because its fast drying & matte so nice surface to work onto. When the newly sealed surface was dry I white washed it Snowflake Fresco Finish, wiping off where necessary and added further layers of Snowflake around the edges and to some of the overly-pink patches that I didn't like.

Next up was stenciling - using JOFY PS007. stenciled once in Snowflake: 

.. stencil was cleaned, flipped over and used on other side so the design faces other direction:

 ... added a bit of stencil pattern around the edges:

.. used a fineliner pen to accent the edges:

.. and around the stencil flower stems...

.. BUT, I decided I didn't like the pen detailing on the flower and so coloured over it with paint and a white gel pen, which made the stencil look heavy and a bit messy - this probably wouldn't have been so noticeable had it not been so close to the other flower stem... so.. hhhmmmm how to rescue it....  I decided to white wash over the panel except for the lower flower stem which created a new focal point:

... I created a couple of tags out of kraft card white washed to soften the dark kraft colour, (words are from JOFY11) the tags were tied onto the panel with fine string (a recent favourite product of mine):

Here's another look at the finished panel - really quick'n'easy and fun to alter:

I hope this inspires you to take an existing piece of work and give it a makeover... or to create something new... or just to have fun with paper and paint and stamps...

x
Share:

19 June 2014

I've been growing things....

 over on the PA blog....


Click on the photo to see the entire project on the PaperArtsy blog...

x
Share:

17 June 2014

Stenciling...

... sample board on its way to The Craft Barn to sit on the racks with the JOFY stencil, paints and stamps, but I thought I'd upload it on here too as a reference/helpsheet for the lovely people out there who've bought the stencil - and hopefully it will inspire you to have a play...

I've used the same colour on each flower combination so it is easy to see the different layers:

The flowers are laid out on the board as they are on the stencil.

Here are some more sample tags I made while at the Craft Barn a couple of weeks ago - these flowers have been detailed with doodling and stamping... (& I've just realised that some of those flowers 'need' a button or two....)

L to R:  
NB - the complete flower on each tag is the one stenciled first, masked off and additional flowers added.
All colours/paints are Fresco Finish.
Layers listed in order of working...
Left hand tag:
bottom flower (1st to be stenciled): chalk base with flower 4, Amethyst & Dolly Mix blend with flower 3, stamped detail (black ink) (JOFY24)
top flower (highest on tag): chalk base with flower 4, haystack & amethyst blend with flower 2, doodled lines.
Middle tag:
bottom flower: chalk base with flower 4, amethyst shading with flower 3, stamped detail (black ink) (JOFY24)
middle flower: dolly mix & amethyst mix with flower 2, stamped in chalk using EEV06, doodled in black ink.
top flower (highest): amethyst with flower 3, doodling in white gel pen and black pen
background: freehand doodling

Right hand tag:

bottom flower (1st to be stenciled): chalk base with flower 4, Dolly Mix blend with flower 1, stamped detail (black ink) (JOFY24), haystack centre
top flower (highest on tag): dusty teal with flower 2, mix of chalk & dusty teal with flower 1, doodling/detail with white gel pen & black pen


These are simple flowers, and hopefully it will help you to realise the possibilities of the stencil - & don't forget its not just for paper & card - its a lovely stencil for working on fabric too....

xx
Share:

16 June 2014

Dahlia's...

 .... glorious luscious pompoms of colour!! I really enjoy having them in the garden and watching them bloom... I thought I'd share some floral inspiration/eye-candy with you- colour (hot pink & orange!!) and form...


love how the colour is different on the underside of the petals:
(hahaha do you like how my nail varnish unintentionally matches the flowers!)


and even when the flowers have turned and are dying off they are still striking and interesting:
 lovely crinkled petals drying out in the sun..

xx


Share:

11 June 2014

This little lady....

... has been waiting patiently in my garden to have her photo taken.... 


..well in truth she's been sat on my studio desk while I decide whether or not to turn her into a bigger project - I've decided against taking it further and so here she is - in the garden of the www for a breath of fresh air.

She's a Prima Girl, on a Prima Tag - flowers are all JOFY images - the real flowers are a Clematis - I love the detail of the flowers on this variety...

She was posing on the gates that I bought last year - LOVE how big, distressed, rusty and OLD they are (approx 5feet in height). We've moved them from the back fence to a side fence so they get more sun:

The clematis is settling in nicely and growing around the gates' detail - makes me very happy - just what I wanted it to do:
(& look at that fantastic cracked paint!!!)

I'm quite new to this gardening malarky - and as well as a few fails there have been some successes, such as the digitalis that has basically sewn and grown itself - my kind of plant lol.... I like these a lot - so pretty - especially the inside of the flower

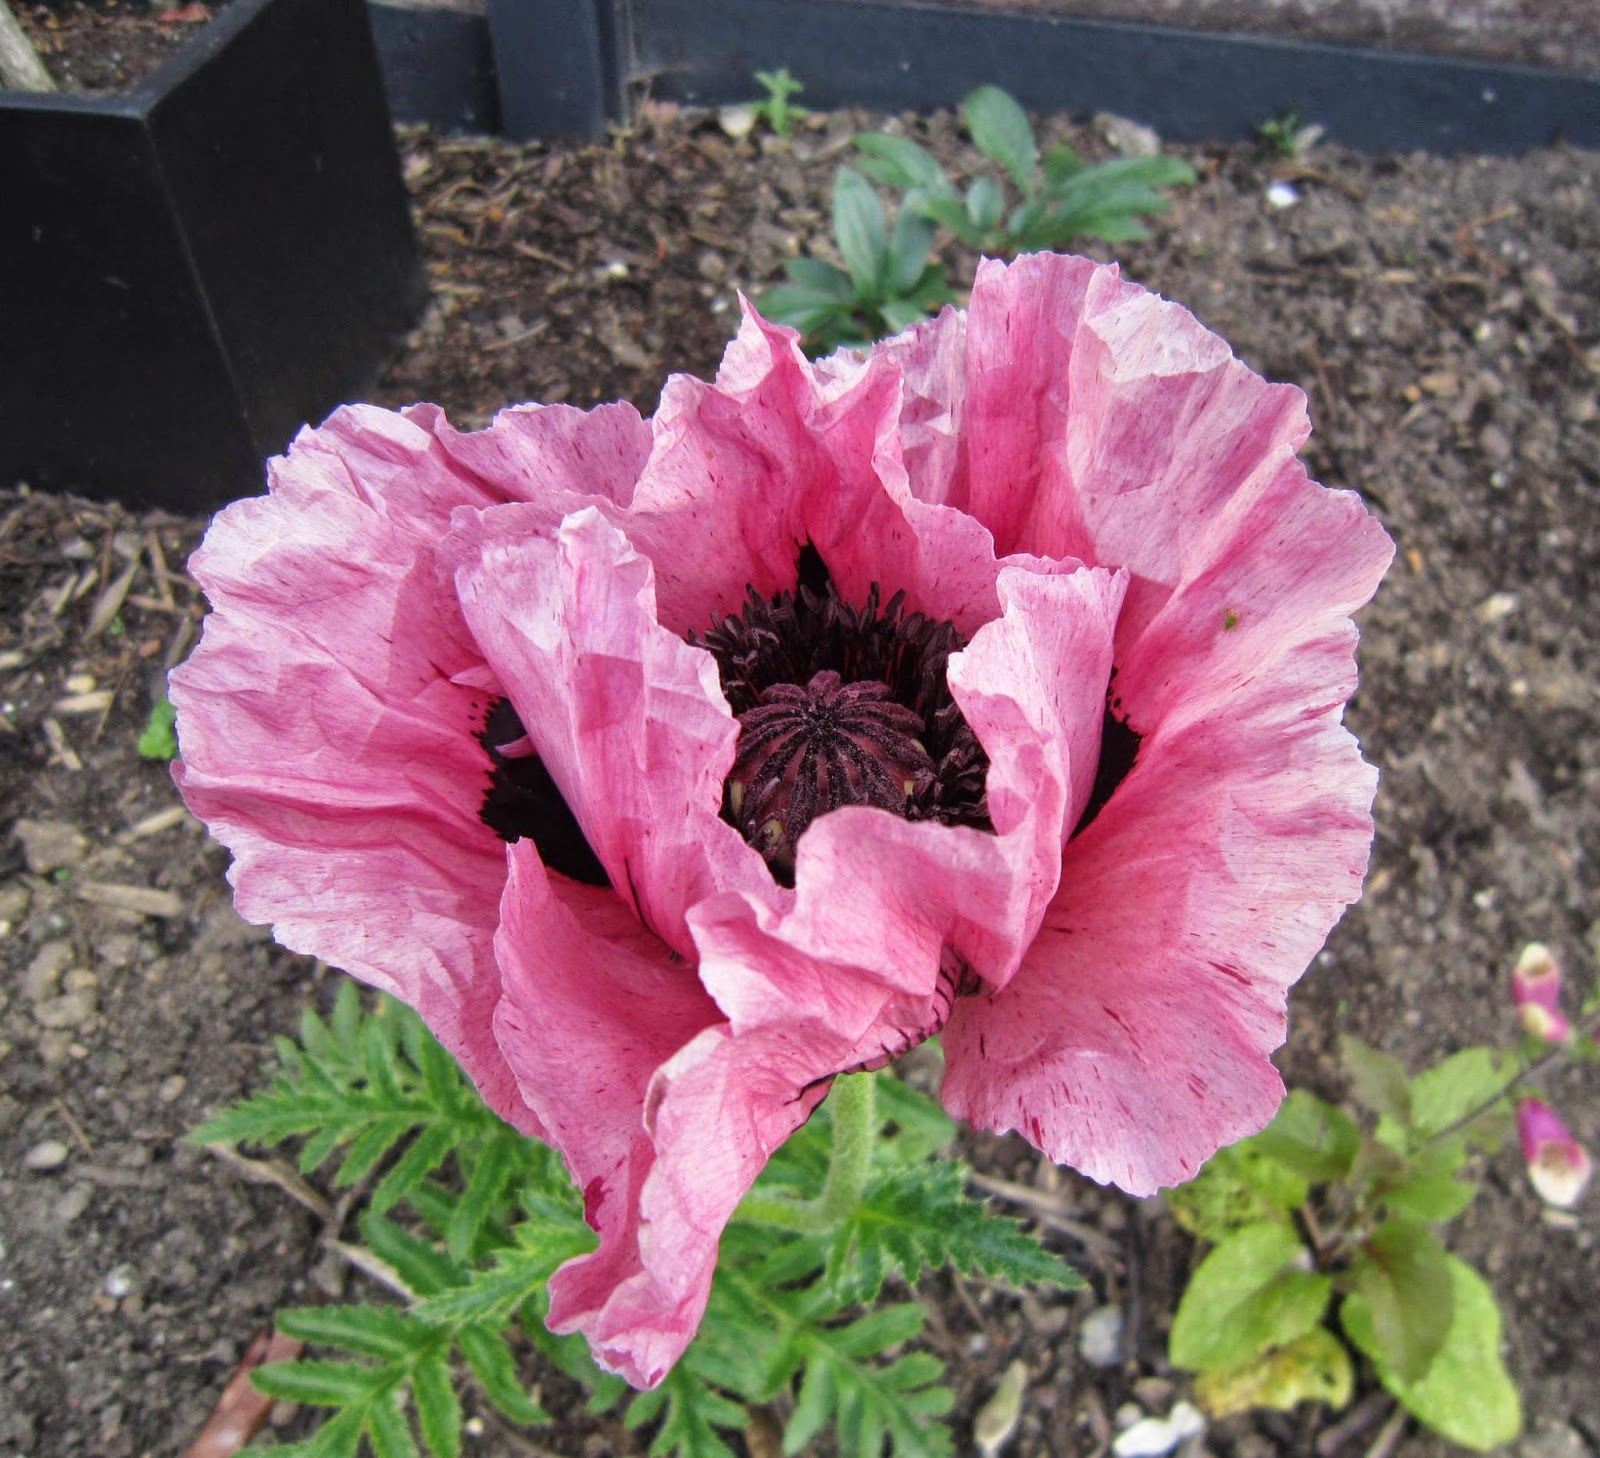
This morning the popped head burst - revealing this gorgeous flower:


all those 'frilly' pieces are so delicate they move move in the wind..
Love the aubergine markings on the underside of the poppy, solid on the inside.... but sadly it has started to fade already.. makes me a little sad...

and finally, in stark contrast to the delicate poppy, here is the most vicious plant in the garden - a white eurygnium - look but don't touch - they're really sharp!! lol

Mother Nature really is a clever chick isn't she!

We now have 2 more gates in the garden! (couldn't resist!) both with clematis growing up them - this one is called Ooh la la:

.. and this one is Josephine - can't wait for this one to flower - its going to have lovely flowers on it - similar to Ooh la la but with mini 'pompoms' in the centre...

I like gardening but not sure I'm patient enough- the plants are NOT growing fast enough - I'm so impatient to see the flowers and their colour!!... lol... but all the plants are quite new so hopefully next year the garden will be bursting with colour - slugs allowing!

xx

Share:

10 June 2014

Lovely day...

... at The Craft Barn for the Extravaganza!


I demo'd: stenciled, stamped, painted, chatted/laughed while demo'ing - putting faces to names, meeting lovely new people - sharing/talking ideas & inspiration... lovely to see everyone.


I mainly demo'd my flower stencil - PS009, with stamps, paints and detail pens... showing how the four flowers can be layered up to create different combinations of flowers ... (I'll show examples of this later in the week...)

The panel below shows the flowers detailed with all kinds of doodling - once you start doodling its hard to stop! (put the pen down & move away from the page! lol)


The Craft Barn sells all the products I demo'd (obviously! lol) and so, as an add-on to the weekend, the links given in this particular blog post will direct you to the Craft Barn store.

In the shop they sell really useful/versatile/inexpensive kraft/natural covered notebooks in different sizes (HERE)- the covers are a lovely surface to paint onto - & I created my demo projects onto these (I think they'd make great little presents..)
Here is the A5 size book -
The cover is painted with Dusty Teal Fresco Finish, with circles stamped in Pearl Glaze (using EEV06 stamp set) - I like this glaze because it is subtle on the background - catching the light now and then without creating an overwhelming pattern.  The large flower is created with stencil PS009, small flowers are stamped in Chalk using images from stamp set JOFY23, and the letters are from JOFY21.

Here is the A6 version - similar design but with smaller dots in the background than the A5 notebook and less flowers...

I really like the contrast of the Pearl Glaze and the Chalk Matte paint.

I created a really quick sample when asked about a stencil - definitely less-is-more - and I really like it - a card that could be used for so many different occasions - love the colour and the simplicity of the design - stencil is PS007 painted with Dolly Mix and Amethyst, the stamped images are from stamp set JOFY24.

So that's what I did on Sunday - thanks again to all of you who came along - these are always great weekends with lots of different styles, products and ideas being demonstrated. I hope you all enjoyed it as much as I did!

I'll be back a The Craft Barn on the 29th June for a Die Cutting Masterclass workshop - hope to see some of you there....details can be found on my teaching page (press the button under the main title at the top of this page) or go direct to the Craft Barn page - here,


xx
Share:

6 June 2014

Its an Extravaganza!!....

... of a weekend at The Craft Barn over the next couple of days....


I love these weekends - I'll be among the 27 demonstrators on site over the weekend - 18 each day - phew that's a lot of creativity and inspiration in one place!

I'll be there on Sunday demo'ing, getting inky painty and enjoying every minute. go HERE for more details...

Hope you can make it.. I look forward to seeing you - please introduce yourselves.. (wear a name badge if you're shy) - its nice to put faces to names I regularly see on my twitter and blog feeds.

xx
Share:

2 June 2014

A fun day at Birds in the Barn....

... was had yesterday - I taught 2 card making classes.. thanks to everyone who came along... cards were relatively 'simple' but still effective...

I designed cards that used JOFY stamps & paints (with a touch of Blood Orange, Tinned Peas & Hey Pesto) and a mash-up with Lin Brown's quote stamps (show above centre)
The card below used Sizzix/Tim Holtz trellis die - love that (I can see this die being used a lot).

A fun day - I'll be back at Birds in the Barn as part of their 'Summerfest' taking place on July 10-13 - really looking forward to that - go HERE for more details...
Share:

31 May 2014

Pegs, pegs and more pegs...

.... and pretty pegs too!

Another idea that has been bouncing around in my head - & seeing a bit of  a trend for painted pegs in scrapbooking and card making - I thought I 'needed' some JOFY pegs!

These are just normal wood pegs (maybe a little bit smaller than some available 1x8.5cm) that I bought in Sainsburys (other supermarkets are available lol)
I like these because they have bit of detail on them - 2 lines carved in...

I painted them all in Fresco Finish JOFY Limited Edition paints - no need to prime the wood - nice and easy. Then I added pattern and detail with stamped designs (again with JOFY paints).

On paper: JM34
On cardboard, top row, left to right: JM16, all other pegs are JOFY10
On cardboard, bottom row, left to right:  book text (couldn't resist!), JOFY24, JOFY14, EEV06 (love little spots!)

I could use them to hold notes together, or on a 12x12 scrapbook page, or I could attach them to an indoor 'washing line' and hang sketches, tags and other interesting bits and bobs.


Enjoy your weekend.

x


Share:

29 May 2014

A Touch of Teal...

... well, more than a touch really... all is revealed over on the PaperArtsy blog tonight - you can find it HERE

Share:

28 May 2014

The Artistic Stamper....

.. is where I am happy to be teaching my 'book of blooms' workshop on 21 June..

We'll use JOFY stamps & Fresco Finish paints to create adorable (even if I do say so myself lol) floral inspired books.
There are still a few places left so contact the shophttp://www.theartisticstamper.com/workshops.htm to book your place...


Hope to see you there.

x
Share:

26 May 2014

What weekends are made for...

... an evening with friends - one of those evenings where you laugh so much your stomach muscles ache, your throat hurts and in the end you have no make-up left on because you've cried with laughter..
We started off at the Blackfriar pub - I've always wanted to go in here to see the interior - & it didn't disappoint - I wish I could've taken photos. I hadn't noticed until I looked at this photo how all the building around it have gone... but its still standing! Fantastic.
I hadn't seen several of the friends in a long time - too long - missed them - great evening.

... a fun day teaching a workshop - at Its Crafting Time - where between us we built a terrace of houses - Balamory has nothing compared to these lovely JOFY houses:

... a day in the garden - tidying up, buying and planting new plants - LOVE lupins - mini towers of colour... this is my current favourite part of the garden:

... time spent with Family - nephews birthday - I made a card for him - boys/mens cards are hard aren't they? (or is that just me!) (must challenge myself) - this one was created thanks in part to the PaperArtsy brayer masterboard video that was on the blog earlier this month.

... all that, and there's still today!  Gotta love a Bank Holiday weekend!

Hope yours is good...

xx
Share:

23 May 2014

A calendar of weekend workshops...

& I have some lovely ones coming up in June (excuse me if I say so myself! lol).. the first of these is:


01 June 2014
Birds in the Barn, Marks Tey

... where I will be teaching 2 classes of JOFY product based cardmaking - one in the morning and repeating the class in the afternoon.

Contact the shop - there are limited spaces still available on both sessions.

Look forward to see you!

x

PS - If you'd like to see other teaching dates I have planned for the next few months click on the 'teaching and demonstrating' button under the main banner at the top of the blog. :o)
Share:
Blogger Template Created by pipdig