Mixed-media paper crafter; stamper, freelance craft tutor, designer of PaperArtsy JOFY stamps

17 March 2019

New Stamps!!

Yes indeedy... more new stamps!!!


Sketchy abstract flowers inspired by doodles & paintings made on holiday...


PaperArtsy Stencil 135 (PS135)

PaperArtsy Stencil 136 (PS136)

PaperArtsy Stencil 137 (PS137)


Its been soooo hard to keep these to myself - though you may have spotted some of the sketched stems in recent posts and projects (!) - I've really enjoyed using them and I hope you do too!

Thanks for stopping by - make sure you visit the PaperArtsy blog for the full release and more samples! go HERE


Share:

13 March 2019

A little bit of this'n'that....

... went in to creating this 5x7in canvas board.
I was just playing around and so didn't take any process photos, but after being asked about it on Facebook and Instagram I wanted to list the products I used.
PaperArtsy stencil: 
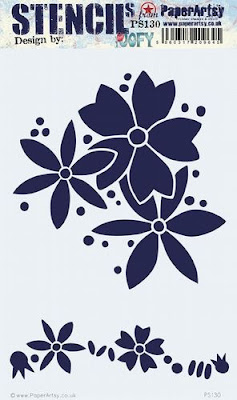
PS130


PaperArtsy stamps: 
JOFY73

(and a secret something...)


Dies:
Elizabeth Designs:


Kaiser Craft:
Foliage (DD506) :  sadly now discontinued :o(  
Decorative Dies Foliage

Paint colours, Fresco Finish (of course, lol) were.. I think...
Lavender, Cerise, Vanilla, Koala, maybe Bougainvillea, and possibly some Seaglass (gotta love a Seaglass! lol), and a touch of Green Patina/Sargasso

These might not be the exact colours but when you blend them they are going to look FAB.U.LOUS!

Play with the colours - you'll find things you didn't expect and have fun!

Search for these items at your local shops, and online.

Thanks for stopping by!


Share:

16 February 2019

Not just a block of wood...

... its a substrate for doodling!

I really like working on these 'offcuts' of wood... I like the texture of the wood, and the weight of them - and they are easy to use as substrate because the wood is nice and smooth to work on.


I started with a block of wood painted Slate grey...

Planned where the position of the mask/stencil making sure that it would wrap nicely around the sides of the block... (This stencil is PS085, one I designed for PaperArtsy - you can buy/order it from your local PaperArtsy stockist)

I sponged 2 colours of paint (Guacamole & Chalk) across the surface of the block blending as I went along...

I really like the resulting contrast of the grey, green and white....

Couldn't resist breaking out the white pen and got busy doodling on top of the Slate - it makes the design much more delicate...

Its hard to know when to stop doodling... lol


Thanks for popping in...


Share:

13 February 2019

Classes at Create98...


Create98 is a great new workshop venue on The Broadway in Leigh-on-Sea, Essex. It offers a fantastic variety of creative classes - flower arranging, photography, painting, printing & sewing to list just a few.
You can see all the details and class listings on their website at www.create98.co.uk 

I’m really pleased to be offering two days of classes - 

16 March 2019
AM: Card making : bottom right photo above shows samples of the style of cards we'll be making
PM: Blooms around the block : left hand photo shows sample - create in colours of your choice

06 April 2019
Cover to contents : upcycled journal making (top right photo) - this is a sort of Wombles approach to journal making - using found papers, upcycled element and lovely bits and pieces to create a junk journal... (start saving envelopes and interesting bits and pieces now!)


To book a place please contact the shop either via the website or on the phone.

Hope you can join me!!


Share:

24 January 2019

New stamps!

I'm thrilled to have new stamps to share with you! 

These new stamps are a bit bigger than previous releases opening them up to even more uses!


JoFY Collection Stamp Set (JOFY71)

JoFY Collection Stamp Set 72 (JOFY72)

JoFY Collection Stamp Set 73 (JOFY73)
  
PaperArtsy Stencil 130 (PS130)

PaperArtsy Stencil 131 (PS131)

PaperArtsy Stencil 132 (PS132)

Quick information about the above stencil which I think/hope is going to be really versatile.  I wanted to design a kind of 'mix and match' stencil. Four variations (at least!) can be made using the two parts.  The spots (top) and swirls (bottom) look really nice used on their own, but when stenciled in a different order they look quite different as illustrated in the photos below.


The patterns are quite different but they are really easy to match up to create that slightly off-set look. Choose your first stencil & apply colour. Remove the stencil, dry the paint. Lay the second stencil on top of the created pattern, match up the small spots and add your second colour.


More details and samples over on the PaperArtsy blog tonight and all products are available from your local PaperArtsy stockist.

I hope you like them as much as I do!

Share:

10 January 2019

Creativation 2019

I've been a bit quiet lately because behind the scenes I've been working on secret 'stuff' (you many have seen sneekpeaks of that on the PA blog) and getting ready to go to Creativation - the American Craft Trade show... I'm really looking forward to it.


PaperArtsy has a booth at the show and there will several of the PA designers attending and offering classes - its going to be a really exciting time.

For more details keep an eye on social media and/or the Creativation website (www.creativationshow.org). Its a trade only event so make sure you let your local craft show about it so they can attend and find out about all the new products that will be showcased at the event.

Share:

1 January 2019

Happy New Year!!


Goodbye 2018, it was nice to know you.... Hello 2019, lovely to meet you!

I just wanted to pop on here and say a big 

HAPPY NEW YEAR
&
THANK YOU!

 to all of you who come to my workshops, buy my JOFY stamps, visit this blog or like my Instagram posts - I really do appreciate it... 

I have a good feeling about the coming year, and I hope it brings all you wish and hope for...

xx


Share:

7 December 2018

January Craft Stamper.....

... is out this week and is a fabulously festive issue!  So if you need an extra bit of inspiration for your christmas this is the magazine for you!


I'm feeling extra festive as I have an article in there too...


So if you want to feel a bit less 'bah humbug' and a bit more 'ho ho ho' then go grab yourself a copy - you really won't be disappointed!

Merry christmas!!


Share:

27 November 2018

Christmas cards....

.... are on the {ever growing} christmas 'to-do' list... and I wanted to share with you a couple of cards I made using stamp set JOFY69 and the smaller of the two trees...  they're quite simple, a little bit 'less-is-more', bit of paper piecing and a sprinkle of glitter...


JOFY 2018

When I designed these trees this is how I planned to use them - layering up different patterned papers.  I picked out some papers from the 8x8in pads I have in my stash (Basic Grey... sigh.. I miss their papers). 

I chose three patterns that I thought worked nicely together and, using my stamping platform, stamped 3 trees and cut them out.

I cut the trees up ready to be layered - leaving a tier above or below the required tier so that there is something to attached it to (that's quite hard to explain lol) 

The trees below are created from the trees above... (I used a Tombow glue stick to attach them together as it gives a bit of wiggle time)

The trees looked a bit flat so I added depth by shading below the line of each tier to create shadow. (Tombow Brush Marker in pale grey) - simple but makes a big difference when you compare the above and below photos.  (I also added a white top tier to one of the trees, I thought it didn't have enough pattern changes).

I stamped the tree trunk several times onto brown printed paper and cut out leaving excess at the top (looks like a little mushroom!) so the trunk could be attached to the tree.

Here's the trunk from the front.

These trees are a bit time consuming but worth it! (in my humble opinion).

To make the cards I took a 10cm panel of kraft card and stamped JM07 down one edge (this snowflake stamps is a definite 'go-to' for me!), mounted it onto a 12.5cm card and 3d mounted the tree on top - overlapping the edge to tie the two panels together.


This card is the opposite colour combination to the card above - they're the same but different.  I like that.  I added a touch of glitter (Stickles) and gold paint (PaperArtsy White Fire Fresco) for a bit of sparkle.

I think this is a good card to make sitting down in front of the tv with a nice christmas film... a bit of stamping, bit of fussy (but not too fussy) cutting and some sticking!... and you can attack the stash in the process.!  ho ho ho!

Thanks for stopping by!


Share:

14 November 2018

A touch of sparkle and shine....

... over on the PaperArtsy blog tonight...


click on the photo to visit the blog...


Share:
Blogger Template Created by pipdig